Account and organization setup
Create an account
To create an account with Swit, click Sign up and enjoy Swit for free located at the bottom of the sign-up page. Once you enter an email address, verify, and finish signing up, you can use the free trial for 30 days. You will also create an organization when you sign up. The signup process is as follows:
-
Set up your account email address and password, and verify your email. The password must be set to 10 characters or more, including at least one letter, number, and special character.

-
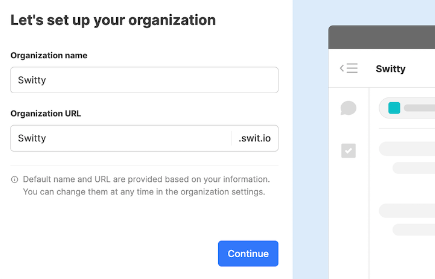
After email verification, you can start setting up your organization. Enter the organization name and URL in the organization settings window.
-
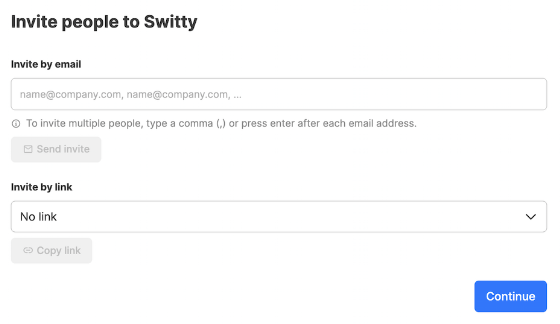
Invite members to your organization. You can list multiple account email addresses using a comma (,) and invite up to 25 members at once.
-
Install the Swit app to open the standalone app, or start Swit from your web browser.

-
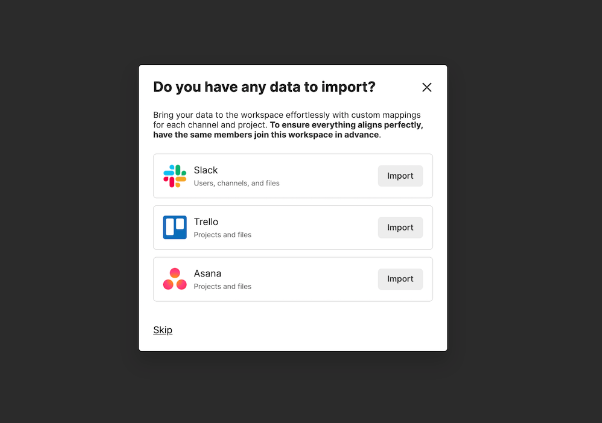
Choose the external data you want to import. You can skip this step.
-
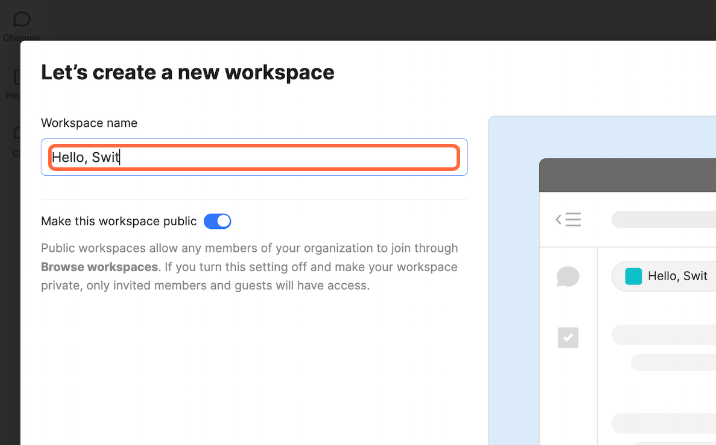
Create your organization's first workspace. Enter the workspace name, make it public or private, and complete the process.
NOTE
By default, you cannot access the channel or project menu when creating an account and organization for the first time. After creating a workspace, you can use the desired features in channels and projects within that workspace. Please create a workspace first.
Sign in to Swit
You can sign in to your account and organization as follows:
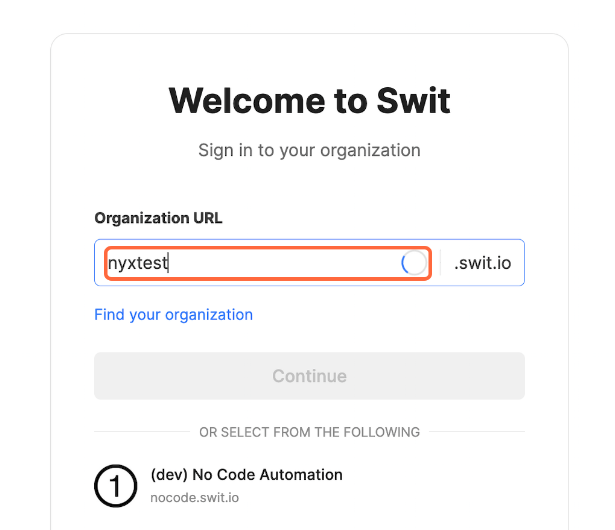
- Click Sign in, type in your organization URL, and click Continue.
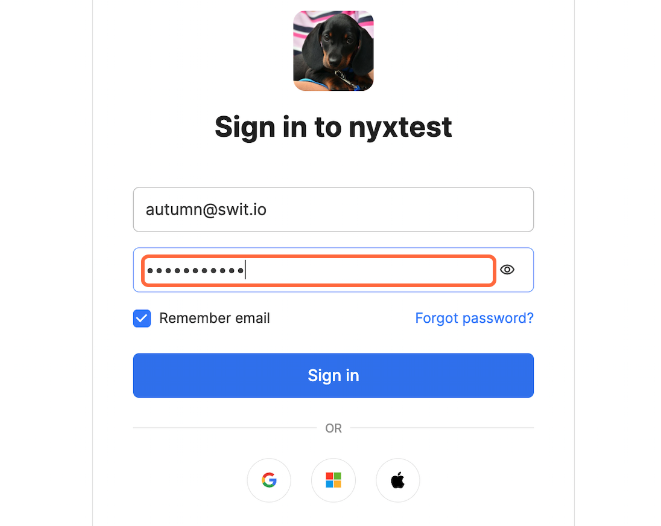
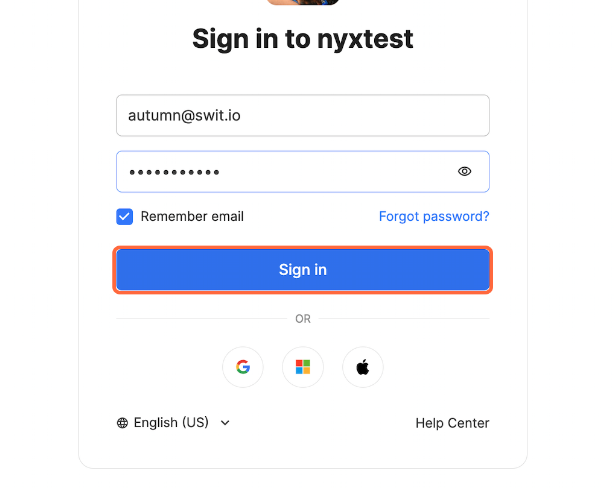
- Enter your account email address and password, and then click Sign in.
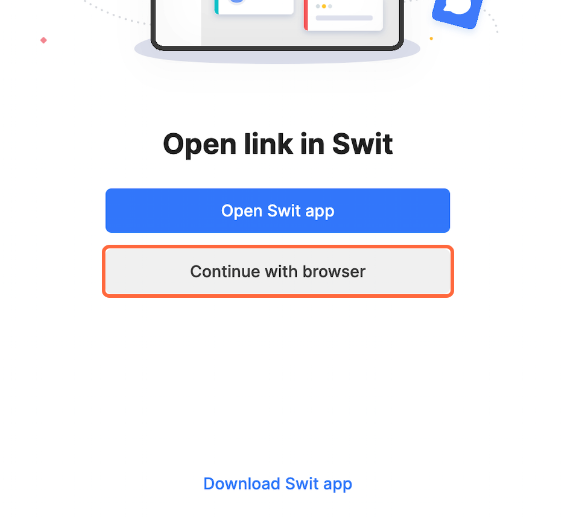
- Click Open Swit app or Continue with browser. If you don't have the Swit app installed, click Download Swit app to download the app.
TIP
You can also sign in to Swit without entering your email address and password.
- If you have a Google, Microsoft, or Apple account, you can sign in without creating a separate account.
- For organizations that allow SSO, you'll see the Continue with SSO button on the sign-in page. In this case, you can sign in with the account specified by your organization's IdP.
Find your organization
You have to enter your organization URL when signing in. If you forgot your organization URL, click Find your organization. If you enter your email address on the organization find page and verify your email, you'll see the list of all organizations you're participating in. From the list, select the organization to sign in to. If you want to sign in to other accounts and organizations, refer to the Multi-account, multi-organization section.
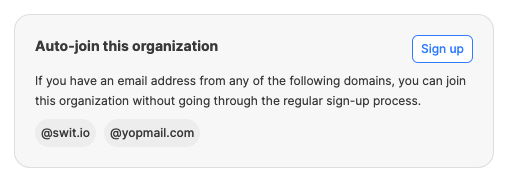
Auto-join an organization
If your organization has designated a specific email address domain, you can join the organization directly without the signup process.
Invite members to your organization
In addition to inviting members when creating an account and organization, you can also invite members as follows:
-
At the bottom of the core menu, click Admin console.
-
In the Admin console, click Membership.
-
Click Invitations.
TIP
You can also enter the Invitations tab entering the Members & teams tab and clicking Send invitation email.
-
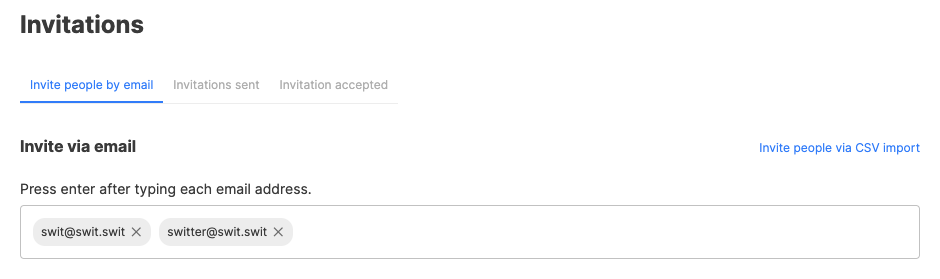
You have the following options to invite new members.
- Invite via email: Enter an email address to invite, and press Enter. You can invite multiple people by listing multiple email addresses.
- Invite via link: At the bottom left of the page, click
 Invite via link to copy the invitation link. Paste the link to where you need to invite a new member.
- Invite via email: Enter an email address to invite, and press Enter. You can invite multiple people by listing multiple email addresses.
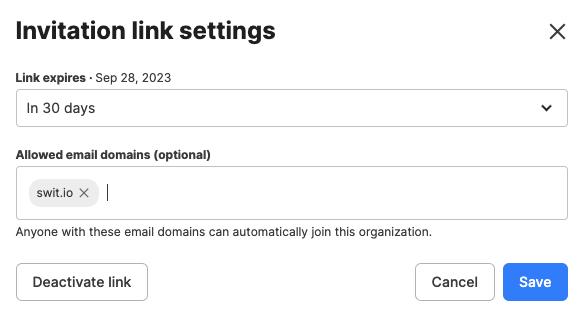
TIP
When an invitation link is created, you can manage the link settings as well. You can set the expiry period for the link, designate allowed email domains, and deactivate the link as well.
-
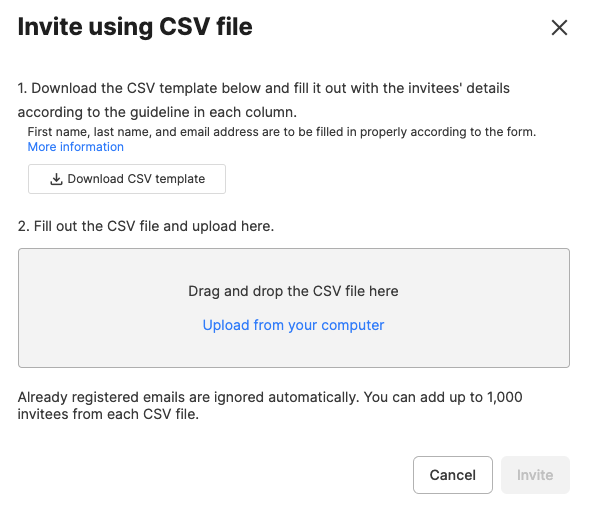
Invite people via CSV import: Click Invite people via CSV import at the top right of the page to download the CSV template, fill in the template, and upload the file to invite members.
-
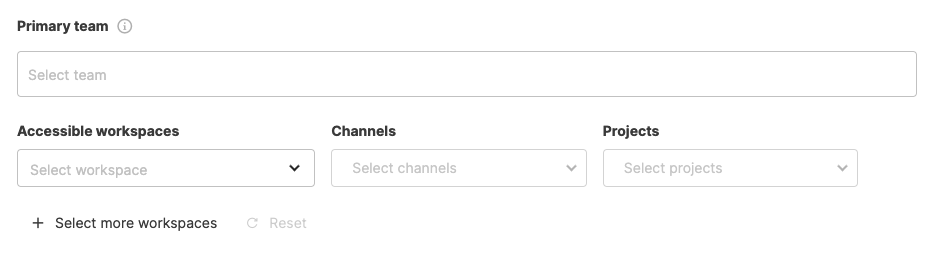
Apart from the email address, you can also set the roles for the members to be invited, and if you want to invite them as admins or members, you can set their primary team and the workspaces, channels, and projects for them to join.
TIP
You can also set the roles for the members to be invited, and if you want to invite them as admins or members, you can set their primary team and the workspaces, channels, and projects for them to join.
Find your password
If you've forgotten dour password when trying to sign in to your account, click Forgot your password? under the password input field. After entering your account email, verify your email, and you'll be able to create a new password.
Multi account and multi organization
Swit provides multi-account and multi-organization support. You can use multiple accounts to sign in to an organization or sign in to multiple organizations using the same account. There's no limit to registering multiple organizations.
TIP
The notifications will only come from the organization or account you're signed in to.
Add accounts and organizations
You can register multiple accounts and organizations within the product after signing in. Once signed in, you can freely switch between the registered accounts and organizations without having to sign out each time. Add organizations corresponding to an email account and see them all in one space. Here's how to add accounts and organizations:
-
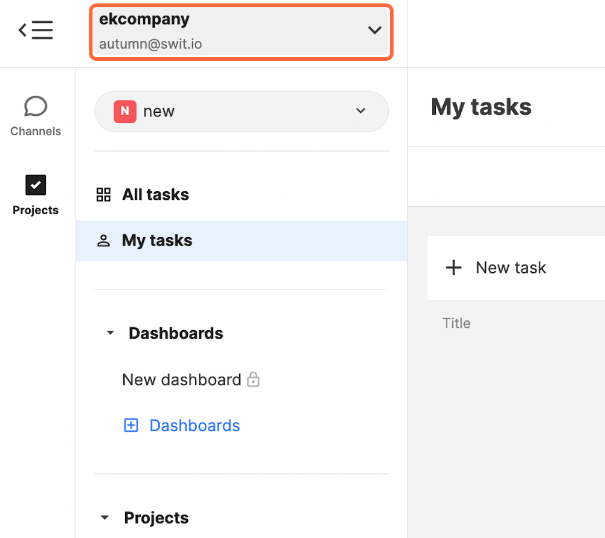
Click on the organization name at the top.
-
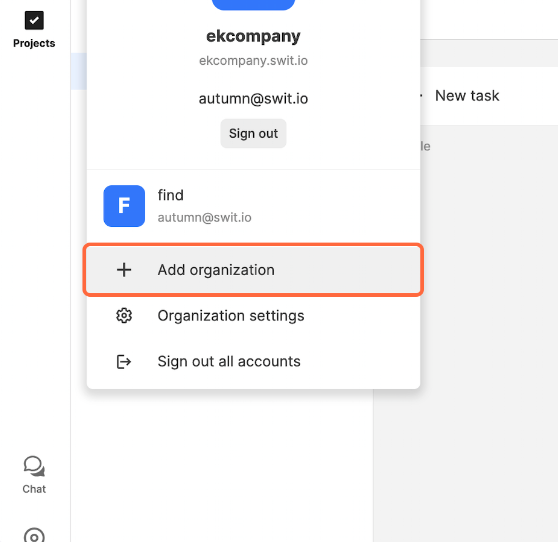
Click Add organization.
-
Enter the URL of the organization to add.
-
If signing in to the organization with the same account, enter the password. To change the account, start by entering a new email address.
-
Click Sign in.
-
Click Open Swit app or Continue with browser to start using Swit with the added account.
TIP
- If you want to remove a particular organization from the list of registered organizations, sign out of that organization or account. It will be added back to the list when you sign in again.
- If you delete the app and reinstall or clear your browser's cache, all registered accounts will be signed out.
Switching between accounts and organizations
If you have more than two added accounts or organizations, you can switch between them at any time. Even if it's the same organization, you can switch between multiple accounts or switch to another organization using different account details. You can also switch between organizations even if they're using different plans.
Sign out
There are two ways of signing out. You can sign out from the account you're currently viewing or log out from all other sessions except the one you're currently viewing.
Sign out from the current account
To sign out from the current account,
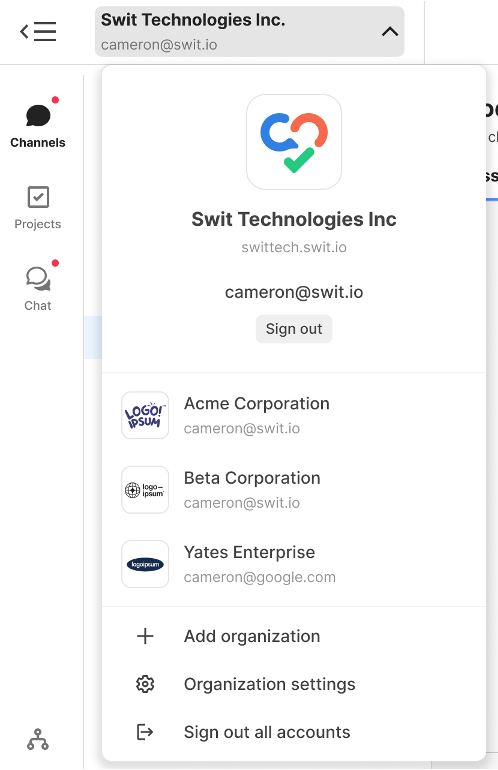
- Click on the organization name in the top bar of the workspace.
- Click Sign out under your email address.
Sign out all other sessions
View all sessions signed in from other devices or operating systems. You can sign out from all other sessions except the one you're currently viewing.
- Click on your profile image on the top right of the workspace bar.
- Click User settings from the profile menu.
- Open the Sign-in sessions tab.
- Click Sign out all other sessions.
Delete an account
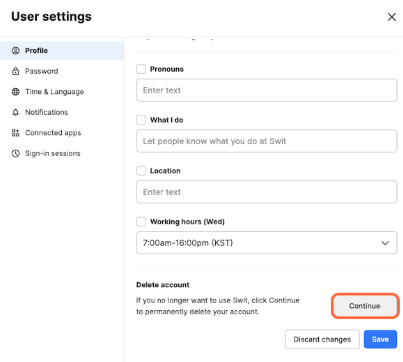
If you no longer wish to use Swit, you can delete your account as follows:
-
Click on the profile image on the top right of the workspace bar, then navigate to *User settings > Profile > Delete account.
-
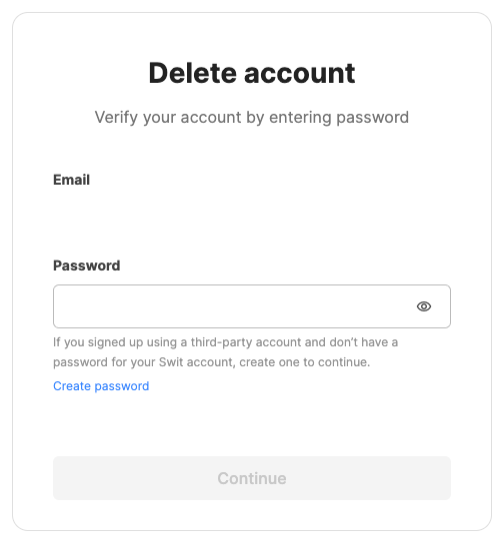
Enter your account password, and click Continue. If you signed up with a third-party account and don't have a Swit account password, you'll need to create a password before being able to delete your account.
Submit a deletion request for your organization
To delete an organization, the organization master must submit a request to the Swit Support team via the Admin console. This process typically takes 3 to 5 days, during which the organization remains accessible. Detailed information is provided below:
-
Required permission: Only the master of the organization can submit the request.
-
Navigation path: Go to Admin console> Organization settings > Delete organization
-
Important notes:
- All workspaces, channels, projects, chats, files, apps, and plug-ins will be inaccessible and unusable.
- Payment credits of the organization will be forfeited and cannot be restored or reused.
- If your organization is on any active subscription, deletion will occur immediately.
- After the deletion is completed, members will receive an email notification.