Billing and payment
As an organization's master or admin, you can view and manage your organization's subscription and payment information in the Admin console. At the bottom of the core menu, click Admin, and click Billing to access the Billing page. The Admin console will open on a web browser.
Swit billing page overview
Here's an overview of the Swit Billing page:
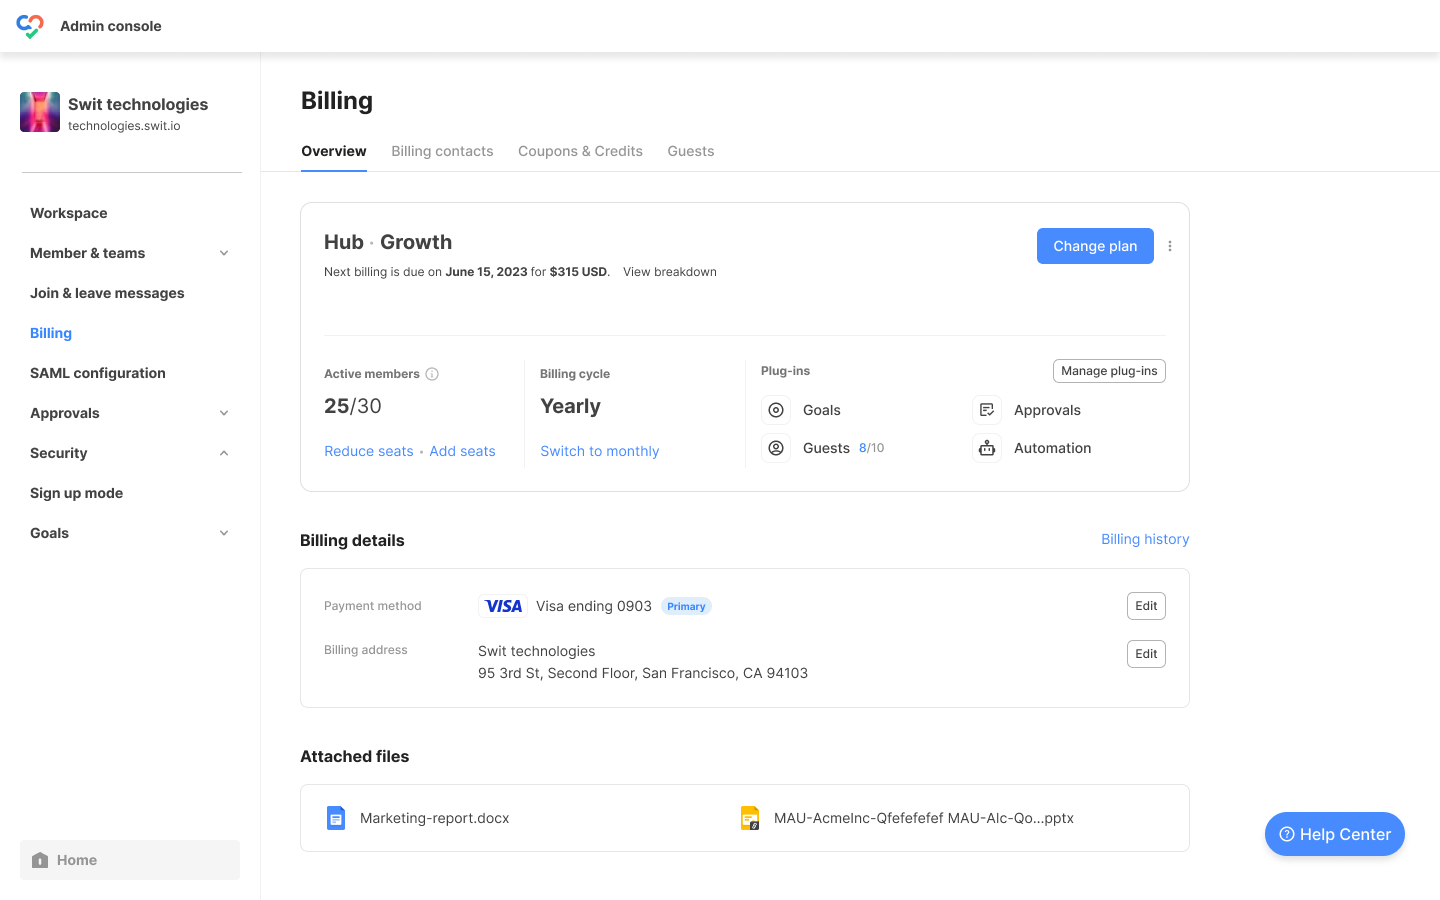
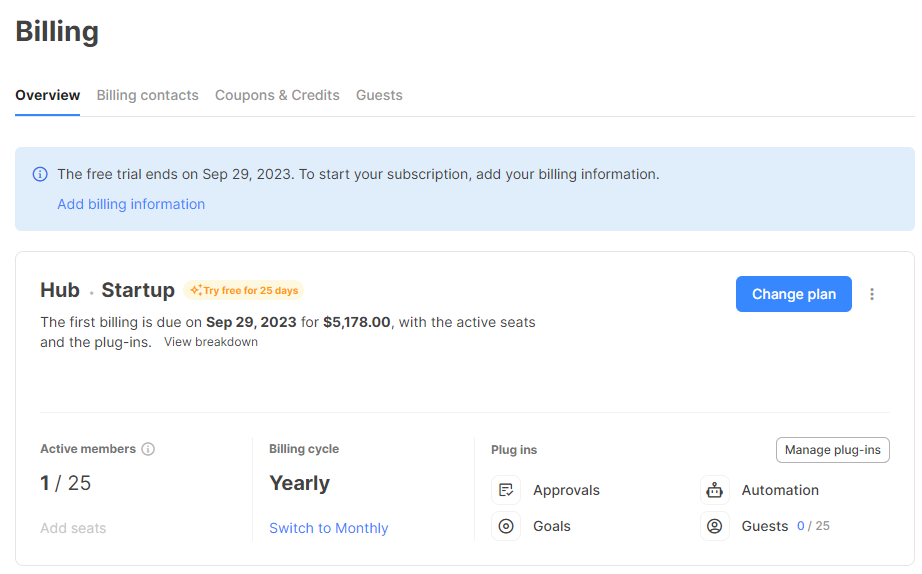
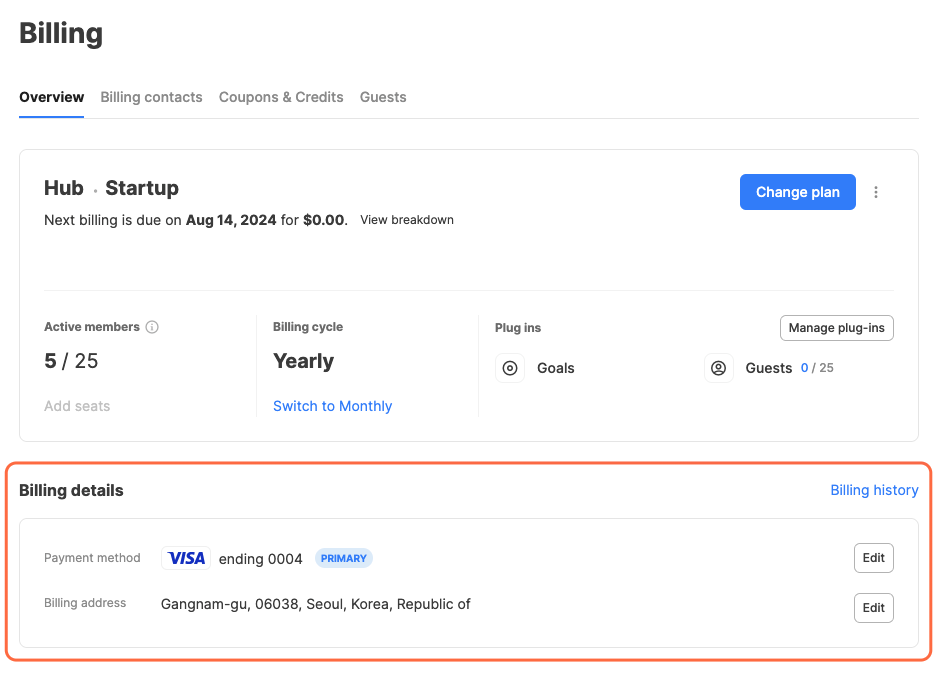
- Overview: This is where you manage the overall settings for your subscription. You can change the current plan and billing cycle, add or reduce seats, manage plug-ins, view the billing details, edit the payment method and the billing address, and cancel your subscription.
- Billing contacts: You can see and edit the email addresses for the billing contacts.
- Coupons & credits: This tab displays the details of the coupons and credits available for use.
- Guests: This tab is only available if your organization is using the Guests plug-in.
TIP
To manage your subscription and billing details, enter the Overview tab.
Bill summary
Click View breakdown at the top of the plan overview section to see the summary of your bill. The Bill summary modal provides a detailed breakdown of your bill, including the fee for your plan, plug-ins, discounts from coupons and credits, and taxes.
Change your plan
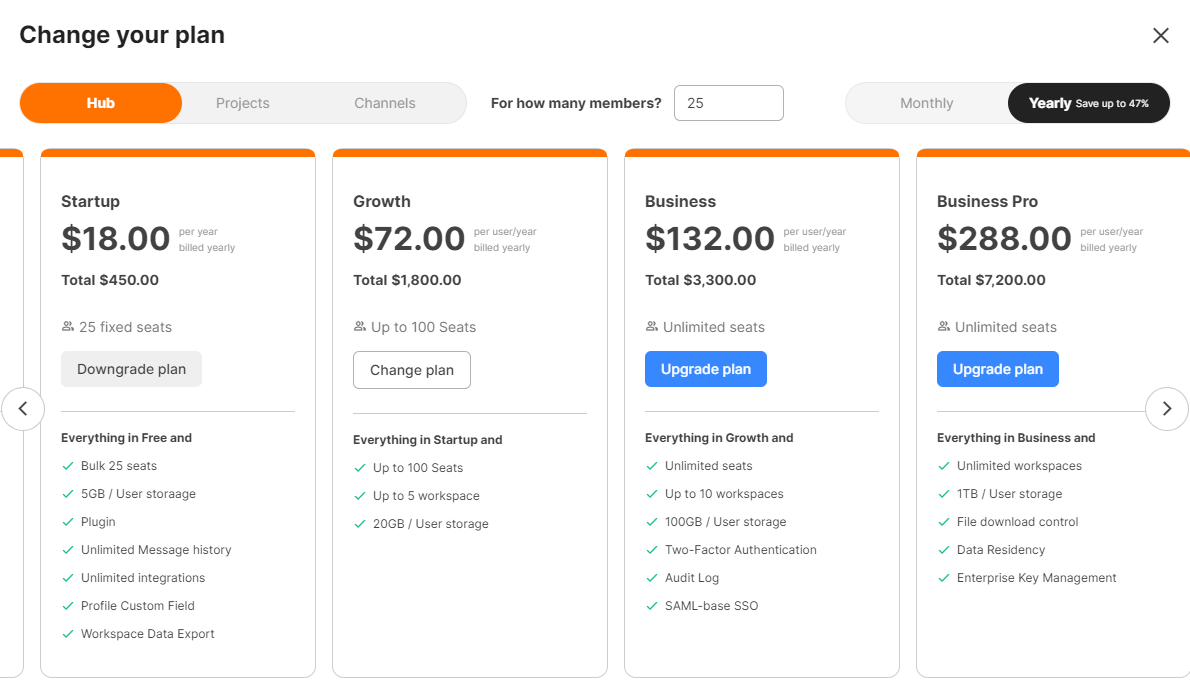
Click Change plan to change your current plan. Next to For how many members?, type in the number of members in your organization to see the recommended plan for an organization of your size and the estimate price. In addition to changing plans, you can also change between monthly and yearly subscriptions.
TIP
You can click Learn more to move to the Swit pricing page.
Upgrade plan
To upgrade your plan:

-
In Admin console > Billing > Overview, click Change plan.
-
Click Upgrade plan under the plan higher than your current plan.
-
Choose the plug-ins you want to add to your plan. If you don't want to add any plug-in, click Skip plug-ins.
TIP
The Approvals and Goals plug-ins are billed based on the number of seats purchased by the organization.
-
Change the number of seats, payment method, billing address, and subscription type if you need to, then click Pay and change plan. You will be charged immediately for the additional price for upgrading your plan.
TIP
When upgrading from the Free plan to the Startup plan or the Growth plan, you may be asked to remove the seats in use in order to meet the seat limit for the plan you're upgrading to.
Downgrade plan
To downgrade your plan:
-
In Admin console > Billing > Overview, click Change plan.
-
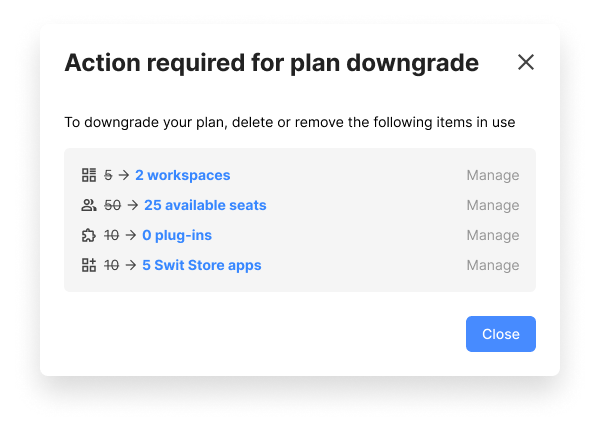
Click Downgrade plan under the plan lower than your current plan.
-
You may have to change the number of workspaces, seats, plug-ins, Store apps, or user storage to use a lower plan. Perform the actions required.
-
Change the number of seats, payment method, billing address, and subscription type if you need to, then click Change plan.
NOTE
After downgrading your plan, the data accumulated from your previous plan will not be retained. To regain access to that data, you need to upgrade back to the original plan.
Change your billing cycle
For the Startup, Growth, and Business plans, you can change your billing cycle to either yearly or monthly. To change your billing cycle:
- In Admin console > Billing > Overview, click Switch to monthly or Switch to yearly.
- Check the price after the change you'll make, and click Continue.
- Change the payment method and billing address if you have to, then click Pay and switch billing cycle. If a change in your billing cycle results in additional charges, you'll need to pay immediately. However, if the change results in a reduction in charges, you'll receive a credit refund.
Cancel your subscription
To cancel your subscription, click on the  icon next to the Change plan button. Your subscription will be maintained until the billing cycle ends, and after that date, your subscription will be downgraded to the Free plan. You can reactivate your subscription before your billing cycle ends. If you click the Reactivate button, your unsubscribe will be withdrawn immediately.
NOTE
When downgraded to the Free plan, you'll experience these limitations:
- You cannot use plug-ins.
- You'll only have access to one year of message history.
- You cannot share to the channels and chats of other workspaces.
- File upload size is limited to 25MB.
- You cannot use project custom fields.
- You don't have access to security features.
Free trial
Once you enter into a free trial, you can change the plan and billing cycle to experience the most useful Swit features and get an idea of how much you'll have to pay after the free trial ends. If no payment method is added after the free trial ends, your subscription will end.
NOTE
A free trial is offered only once per new account. If you have already experienced a free trial for a particular plan, you cannot try another plan for free. You can explore different plans during the free trial period.
Manage plug-ins
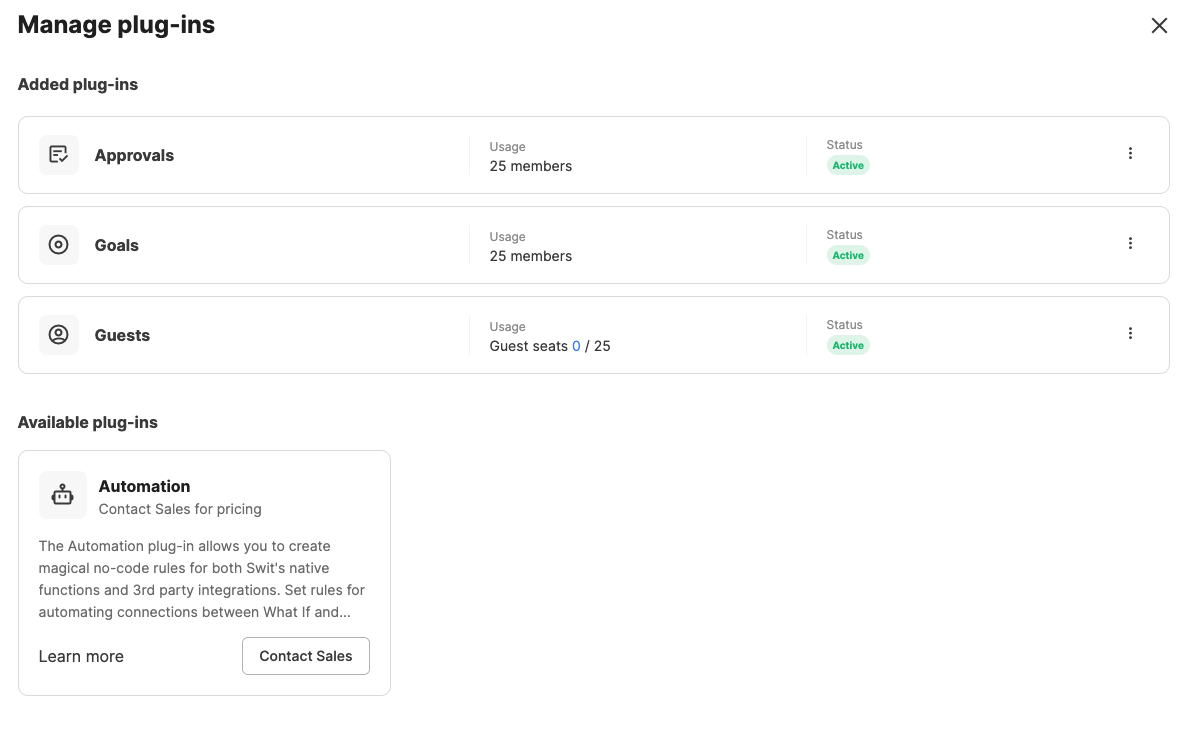
At the bottom right of the plan overview section, you can see the plug-ins you're using. Click Manage plug-ins to see Added plug-ins and Available plug-ins. You can add available plug-ins or remove added plug-ins at any time. You can also add or remove plug-ins while changing your plan.
-
Added plug-ins: This is a list of plug-ins in use in the organization. For the Guests plug-in, click on
at the right, and select Manage guest seats to manage the number of seats for guests and Update Guests.
-
Available plug-ins: Plug-ins not yet in use but available for use in the organization are displayed. If you're using all the plug-ins offered by Swit, this section won't be visible.
Add plug-ins
Swit offers various plug-in features. Add plug-ins to your organization for more enhanced collaboration.
- In the billing overview section, click Manage plug-ins to see available plug-ins. Choose the plug-in you want to use, and click Add.
- You'll see the bill summary for the plug-in to add. Click Next.
- Change the payment method and billing address if you have to, and agree to the terms of service and the privacy policy.
- Click Pay and add plug-ins. You will be billed right away for added plug-ins based on the number of days left in your billing cycle.
NOTE
The Automation plug-in cannot be added by the organization administrators. If you wish to use the plug-in, click Contact Sales.
Remove plug-ins
If you want to stop using the plug-ins, click on ic_morevertical_18 (1).png next to the plug-in your organization is currently using, and click Remove plug-in. Removed plug-ins will be refunded as credits based on the number of days left in your billing cycle.
TIP
Removing a plug-in will remove all its data from your organization space as well. In order to regain access to the data, you have to add the plug-in again.
Manage seats in your organization
The Swit payment system operates on upfront payment, determined by the number of seats purchased in your organization. You have to manage the number of seats in your organization as your organization scales up so that the number of active members does not exceed the number of seats.
Active members
The number of active members in your organization can be found under Active members in the plan overview section. Here you can see Active seats/Available seats in your organization.
Add and reduce seats
For the Growth, Business, and Business Pro plans, you can add or reduce seats in your organization within the range of seats allowed for your plan. To add or delete seats in your organization, click Add seats or Reduce seats. You will be billed right away for added seats, while credits will be refunded for reduced seats based on the number of days left in your billing cycle.
TIP
Accumulated credits will be automatically used on the next payment date.
Payment method
You can manage your payment method in the Billing information section in the Overview tab.
Add and edit your payment method
- If you don't have any payment method added, you can click Add at the right to add a new payment method.
- If you want to change your payment method, click Edit at the right.
NOTE
Only the following cards are available for payment.
- American Express
- China UnionPay (CUP)
- Discover & Diners
- Japan Credit Bureau (JCB)
- Mastercard
- Visa
You can delete a registered payment method. Click the payment method you want to delete, and click Delete payment method.
NOTE
The primary payment method cannot be deleted.
Primary and backup payment methods
In Billing details, you can add multiple payment methods and set one as a primary payment method and another as a backup payment method. To maintain your subscription, at least one primary payment method should be registered.
- Primary payment method: This is the card that is charged first when making a payment. You can’t delete the card assigned as the primary payment method.
- Backup payment method: You can also add a backup payment method to use when your primary payment method fails. If you remove the payment method as backup, the card will not be used automatically even if your payment fails with the primary method.
View and download your billing history
To download your billing history, click Billing history at the right of the Billing information section, then click Download. You will be able to download a PDF copy of the invoice.
Clear your unpaid invoice
When your automatic payment fails, you'll see an unpaid invoice in your Billing page. To pay off your unpaid invoice immediately, click Pay now. If the dunning period ends, your subscription will be canceled.
TIP
Even after your subscription is canceled due to unpaid invoice, you can pay off your outstanding balance and reactivate your subscription. Click Pay now to clear your unpaid invoice and click Reactivate to reactivate your subscription.
Coupons and credits
Once a coupon is registered or credits are accumulated, they are automatically used on the next payment date. In the Coupons & credits tab on the Billing page, you can:
- View Applied coupons and Available credits. Available credits include the refunded credits and promotion credits.
- Add coupon by entering a coupon code. Added coupons will apply to your invoice on the next payment date.