Organization and member settings
The organization administrators have the overall management authority over the spaces and people that make up the organization. Custom emojis and chatbots are managed by clicking on the organization name > Organization settings in the main menu, and all other settings related to the organization, members, and workspace are managed in the Admin console accessed from the bottom of the core menu.
Custom emojis
You can create and manage custom emojis at the organization level. Once you register a custom emoji, you can use it as a reaction tool in various situations along with the existing system emojis. The names of custom emojis cannot overlap.
Create a new custom emoji
You can create a custom emoji as follows:
- Click Show main menu located at the top left of the Swit screen.
- Click on the organization name, and click Organization settings.
- In the Custom emojis tab, click + Create new.
- Upload a file in JPG, PNG, GIF format of 150KB or less, enter the emoji name, and click the Save button.
Search for custom emojis
To search for custom emojis,
- Click Show main menu located at the top left of the Swit screen.
- Click on the organization name, and click Organization settings.
- Look for the custom emoji from the list of emojis on Custom emojis, or type in the custom emoji name in the search window.
Chatbot responses
A chatbot operates on a predetermined response system for frequently exchanged information within the organization using specific words or sentences. Organization administrators can configure trigger messages for announcements or frequently asked questions, the answers for which can be delivered as chatbot responses. Chatbots can only be used within channels, and they require the exact input of predefined trigger messages to function correctly.
Create a new chatbot
To create a new chatbot,
- Click on the organization name in the top left corner of the Swit app.
- Click Organization customizations.
- In the Chatbot responses tab, click + Create new.
- Enter the trigger message that will prompt the chatbot's response. Multiple trigger messages can be added using commas.
- Enter the content for the chatbot's automatic response based on the trigger message and click the Save button.
Search for chatbot keywords
- Click on the organization name in the top left corner of the Swit app.
- Click Organization customizations.
- Look for the chatbot response from the list of responses on Chatbot response, or type in the keyword in the search window.
Signup mode
The organization master and admins can choose one of the following options for new members to sign up for the organization.
- Allow only those who have been invited: Only members invited by the organization administrator can sign up.
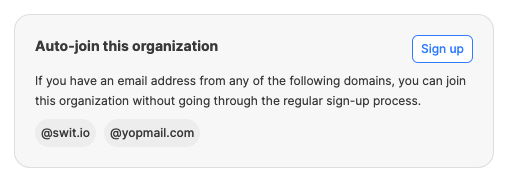
- Allow those who are invited and those who have email addresses with the specified domains: In addition to members invited by the organization administrators, anyone with an email account from a domain specified by the administrators can sign up for Swit without a separate invitation. Multiple domains can be specified, separated by commas.
TIP
When the organization administrators specify allowed domains, it is displayed on the signup page as shown below.
Manage organization member profiles
The organization administrators can manage member account profiles in the following three cases:
-
Manage employee information: You can add or delete teams, job titles, and job levels to the organization members. - Manage account information: You can assign a role to the member, manage their SSO, 2FA, and password settings.
-
Manage account information: You can assign a role to the member, manage their SSO, 2FA, and password settings.ts.
To manage the members' profile information,
-
Click on See more(
 ) at the bottom of the left panel. 3. In the Admin console page, select the Membership tab.
 -
Select Admin. The member whose information you want to change, either by searching or from the list.
-
In the Admin console page, select the Membership tab.
-
Find and select the member whose information you want to change, either by searching or from the list.
-
Modify the desired items on the member details page.
You can also simply view the organization member profile information without making any changes as follows:
TIP
You can also simply view the organization member profile information without making any changes as follows:
- Click on See more() at the bottom of the left panel.
- Select Members.
- In the Members page, search for or select the member you want to view.
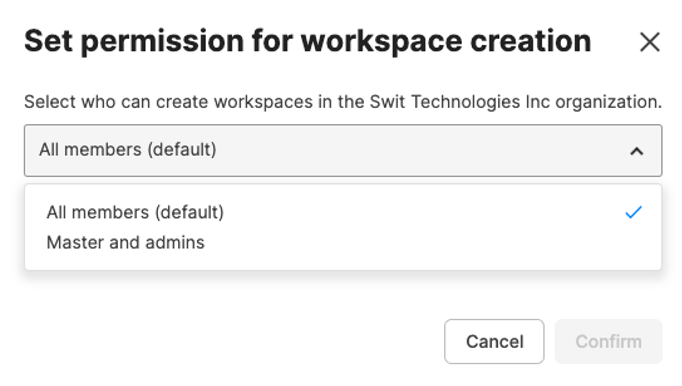
Permission for workspace creation
You can set the permission for who can create workspaces in your organization. It is set to All members by default, but you can change it to Master and admins at any time. To change the settings, visit Admin console > Workspaces, and click Set permissions.
Set up profile fields
Organization administrators can create and manage custom fields to display on members' profiles.
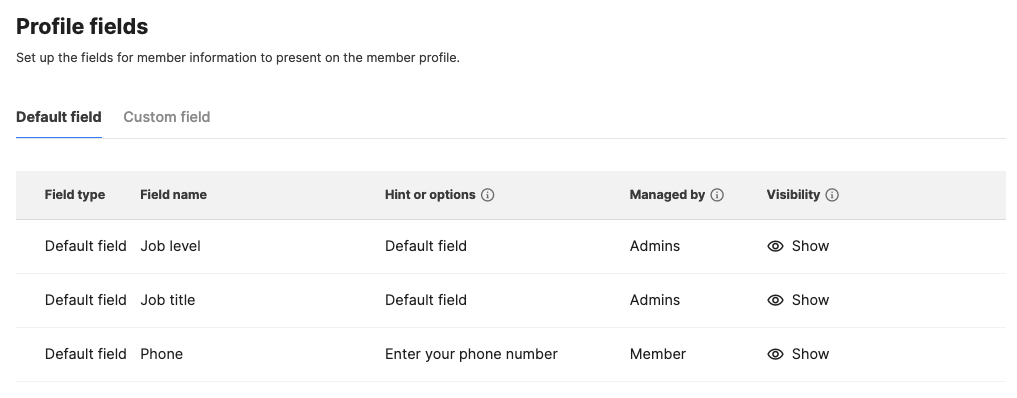
Default fields
These are profile fields provided by default, and organization administrators cannot change them. These include job level, job title, and phone.
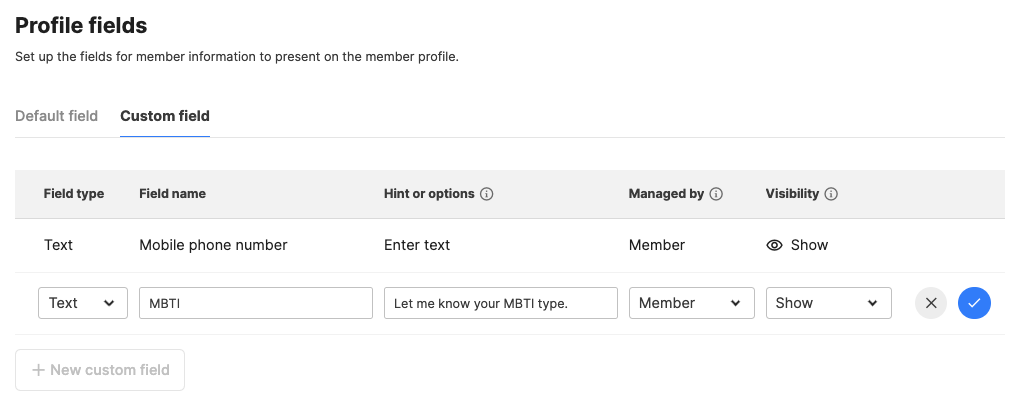
Custom fields
Organization administrators can set up custom fields to better represent members' personal information or positions within the organization. Each custom field is consisted of the following items.
-
Field type: You can choose between text, URL, and select as the type of the custom field.
-
Field name: Set the field name that best represents the topic of the field.
-
Hint or options: Depending on the field type, this area can contain either the hint or options. If you set the field type as "text", you can add a hint to indicate what to enter into a text field. If you set the field type as "select", you can list the options for a select field.
-
Managed by: You can set each field to be managed by Admins or Member. If set as Admins, the fields are managed by the administrators, and if set as Member, the members can edit the fields in their profile settings.
-
Visibility: Choose whether to Show or Hide the custom field on the member profile page. If you temporarily do not want the custom field to be displayed, you can hide it without deleting it.