Invite members and assign roles
This guide will show you how to invite members to your organization and grant them appropriate permissions. Enter the Admin console at the bottom of the core menu.
TIP
Who is this guide for?
- Target audience: Organization masters and admins
- Applicable to: All plans
Invite members and assign roles
You can invite members to your organization as follows:
-
In the Admin console, click Membership, and then click Invites.
-
Select the method to invite members.
-
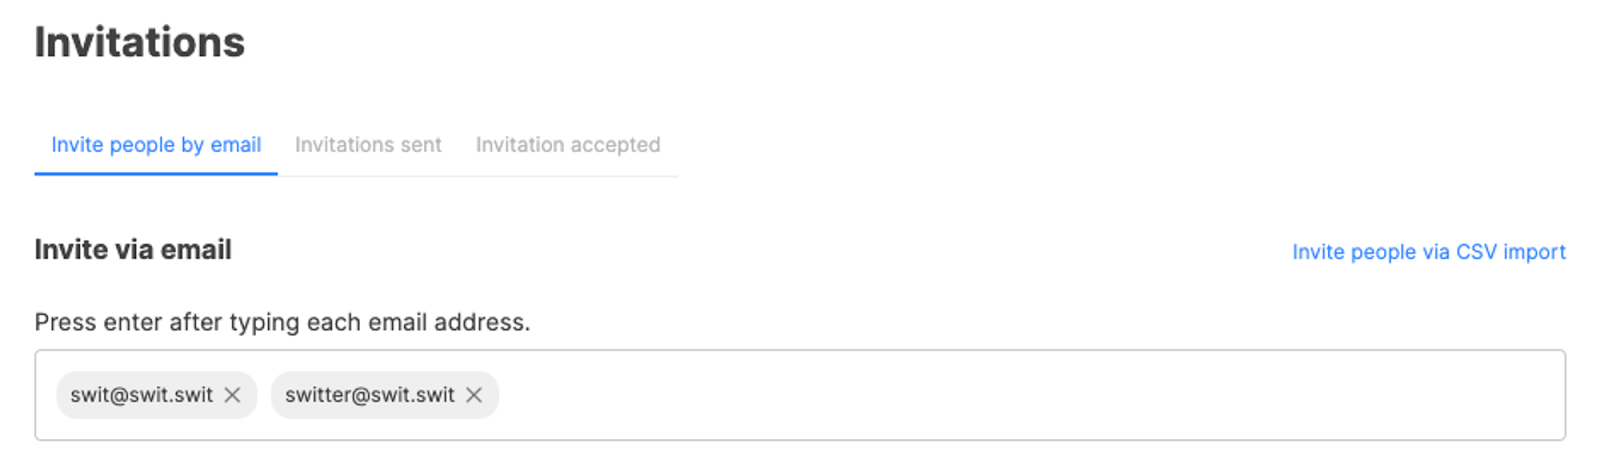
Invite by email: Enter an email address and press Enter. If you want to invite multiple members, enter multiple email addresses. The Send invitation email button is enabled only when you enter one or more email addresses.
-
Invite by link: Click the Invite by link button at the bottom left of the page to copy the invite link. Share the link where you want to invite members.
TIP
As soon as the invite link is created, the Invite link settings button is added on the right. Click the button to set the expiration date and allowed domains for the invite link, and to disable the link.
-
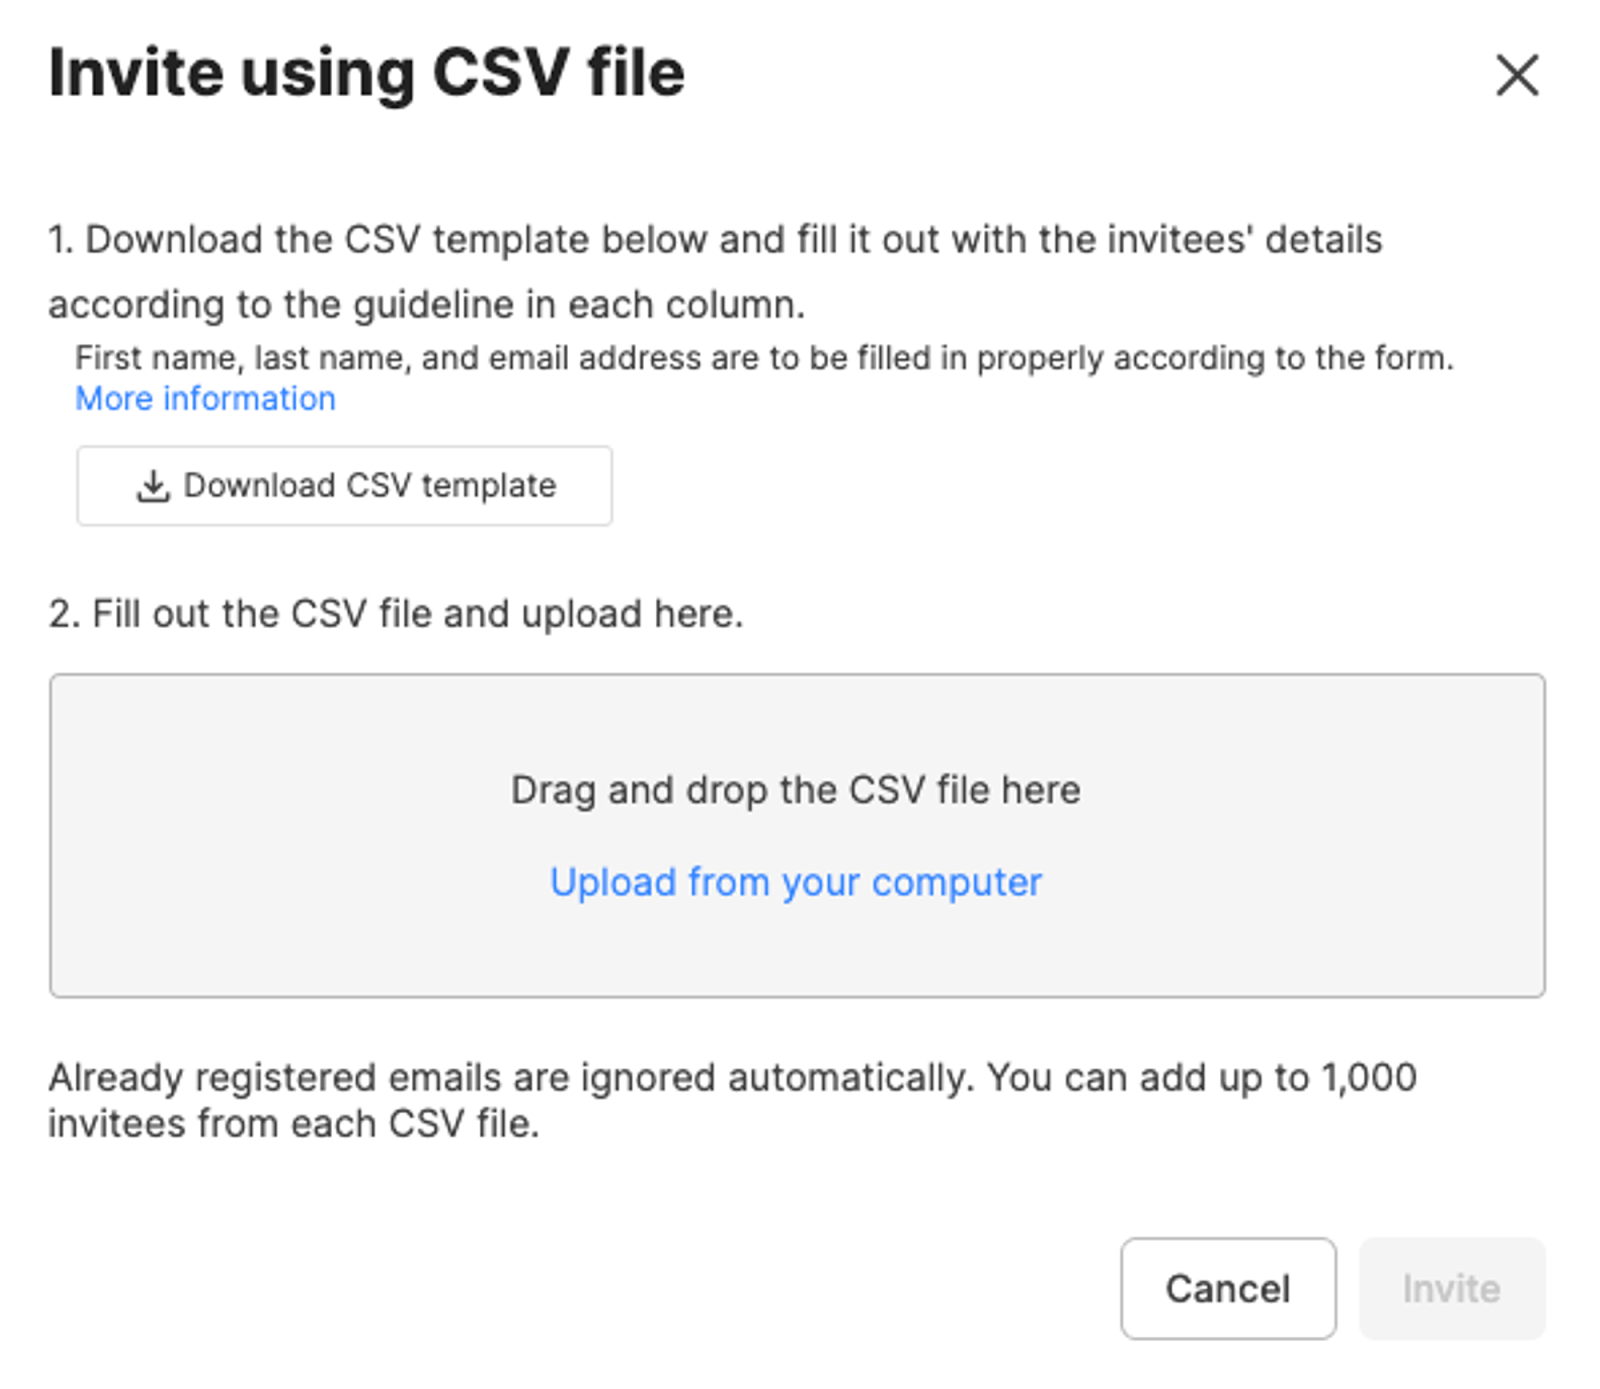
Invite people via CSV import: Click Invite people via CSV import at the top right of the page to download the CSV template. Fill out the CSV template and upload the file.
-
-
When inviting members, you can also set their role as well as accessible workspaces, channels, and projects. The list of workspaces you can select is limited to public workspaces. If the member role is set as Admin or Member, you can also set their primary team.

Note
If you are out of seats, the invite button may not be enabled, or people may fail to sign up via the link. In this case, refer to Billing and payment to resolve the issue.
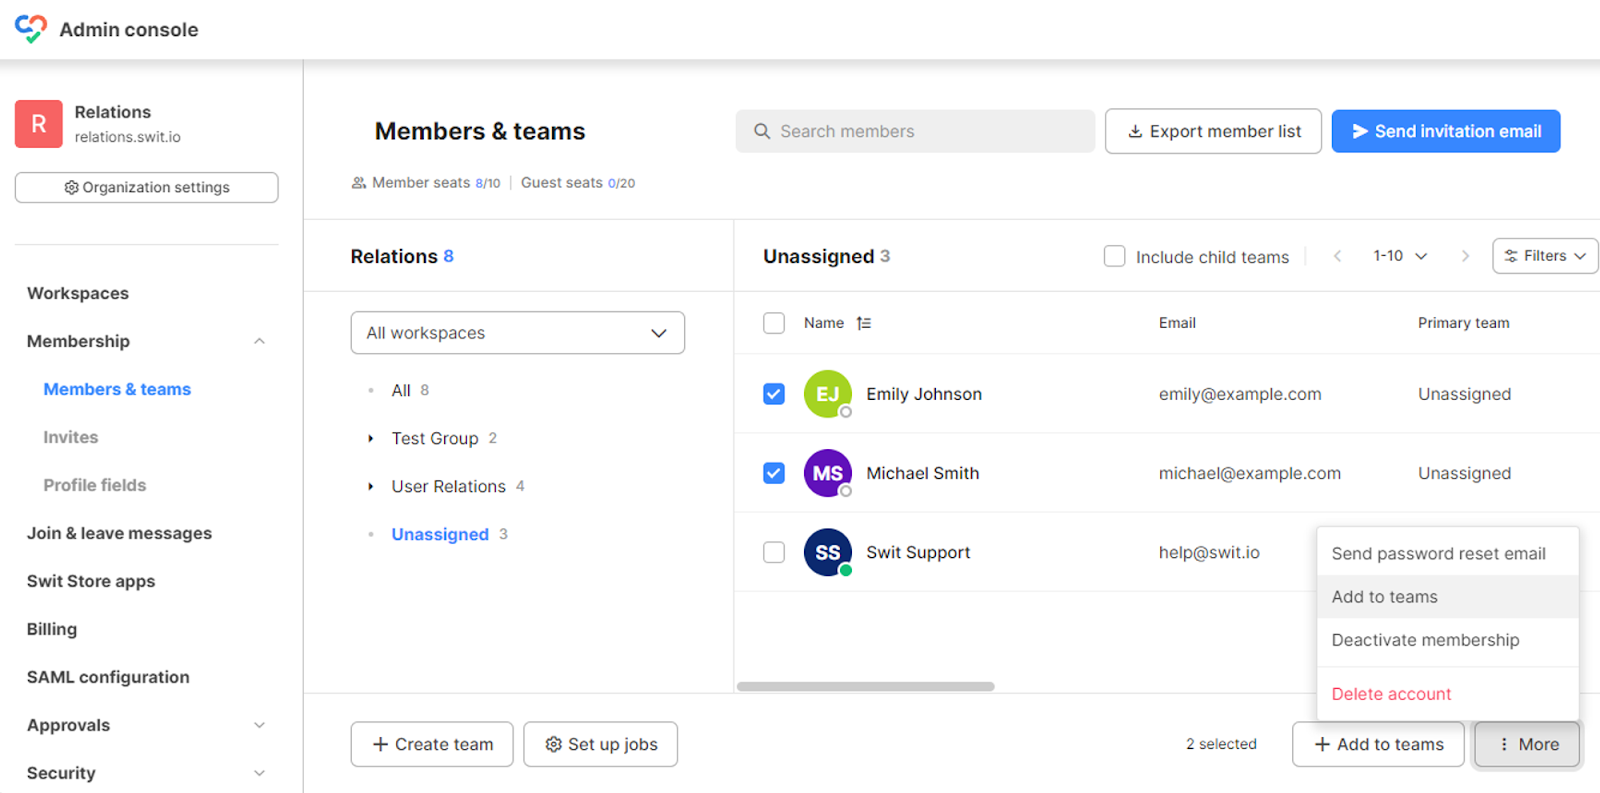
Members & teams
On the Members & teams page, you can create teams, job titles, and job levels. Members who are not assigned to a team upon invitation will be marked as Unassigned. Here are some of the actions you can take on this page:
- Send a password reset email
- Add selected members to specific teams at once
- Deactivate the membership of a member on leave
- Delete the account of a member who has left the organization
TIP
You can also invite members by clicking the Send invitation email button at the top of the Members & teams page.
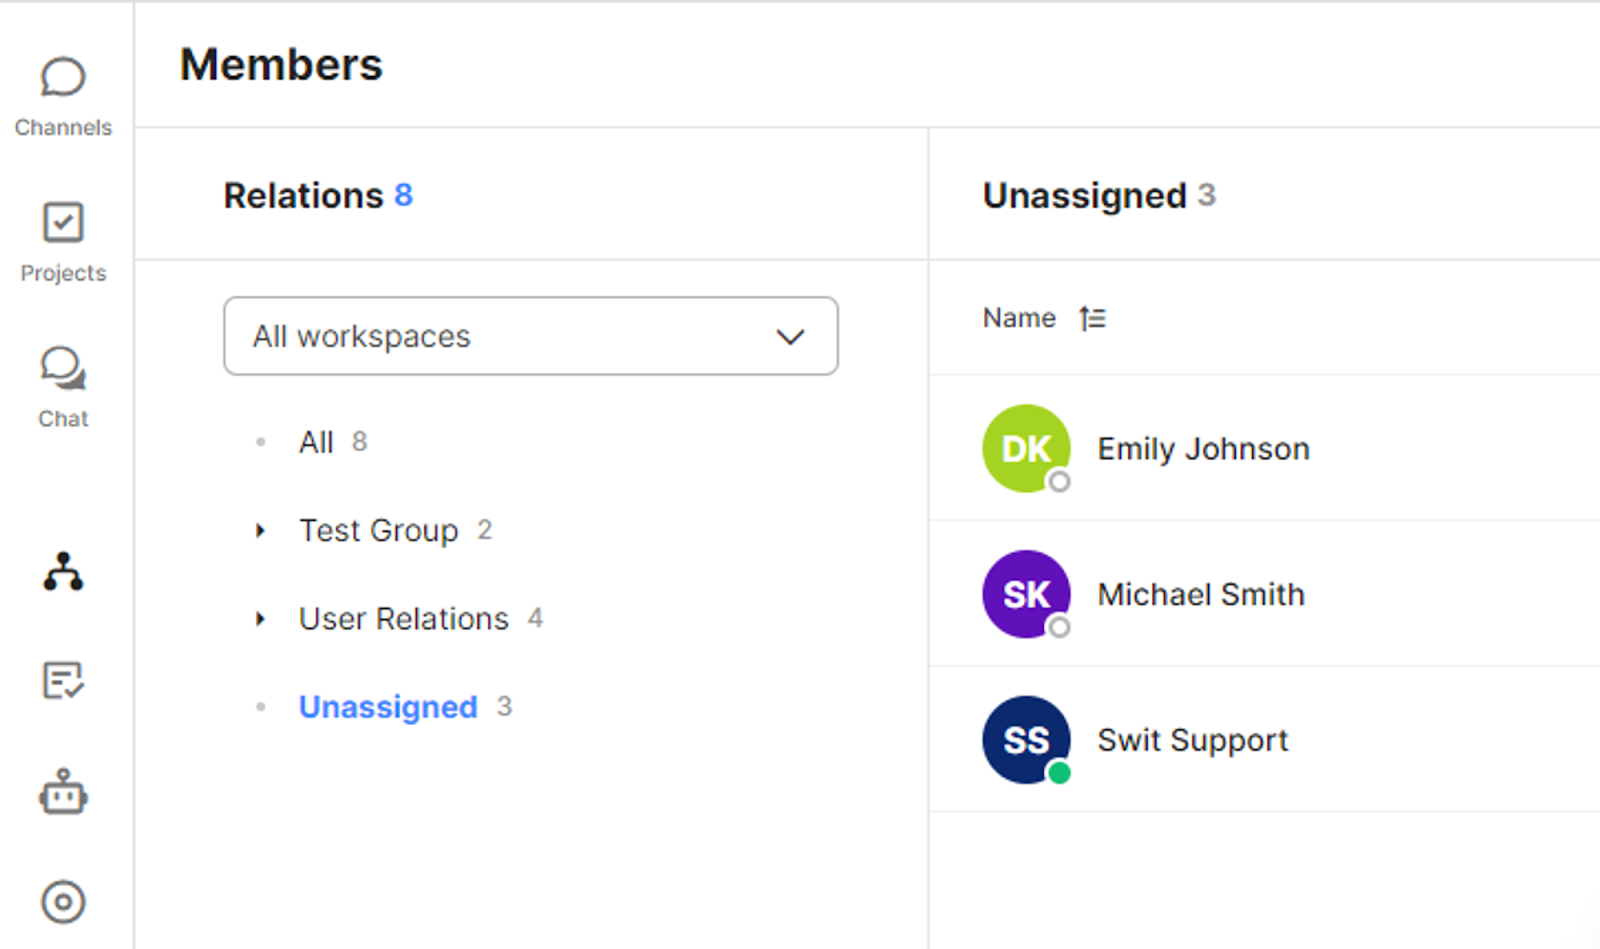
The organizational setup defined here is also accessible in Members from the core menu. Any user with a permission level of member or above can view the organizational structure.
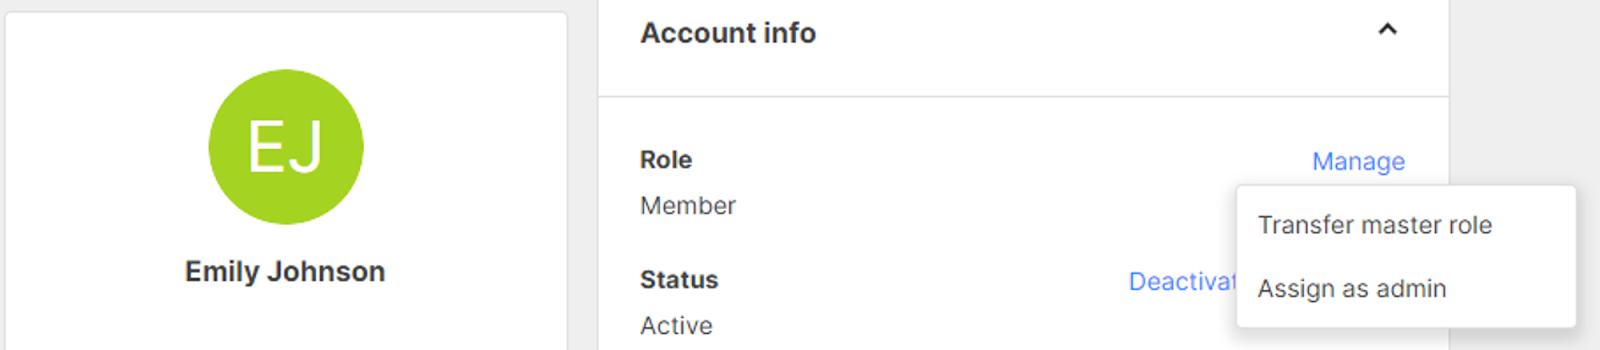
Assign roles
On the Members & teams page, click a member from the list to enter the member details page. Scroll down to Account info to assign a role to the member.
- Transfer master role: The master role is transferred to the selected member, and the previous master becomes a regular member.
- Assign as admin: The selected member is assigned an admin role.
Related topics
- Account and organization setup: Learn how the invited members can sign in and manage their accounts
What's next
You have invited members to your organization and assigned roles. Now, let's move on to create a workspace.