Workspace members
Explore how to invite members to your workspace, set permissions, and create groups.
TIP
Who is this guide for?
- Target audience: Workspace masters and admins
- Applicable to: All plans
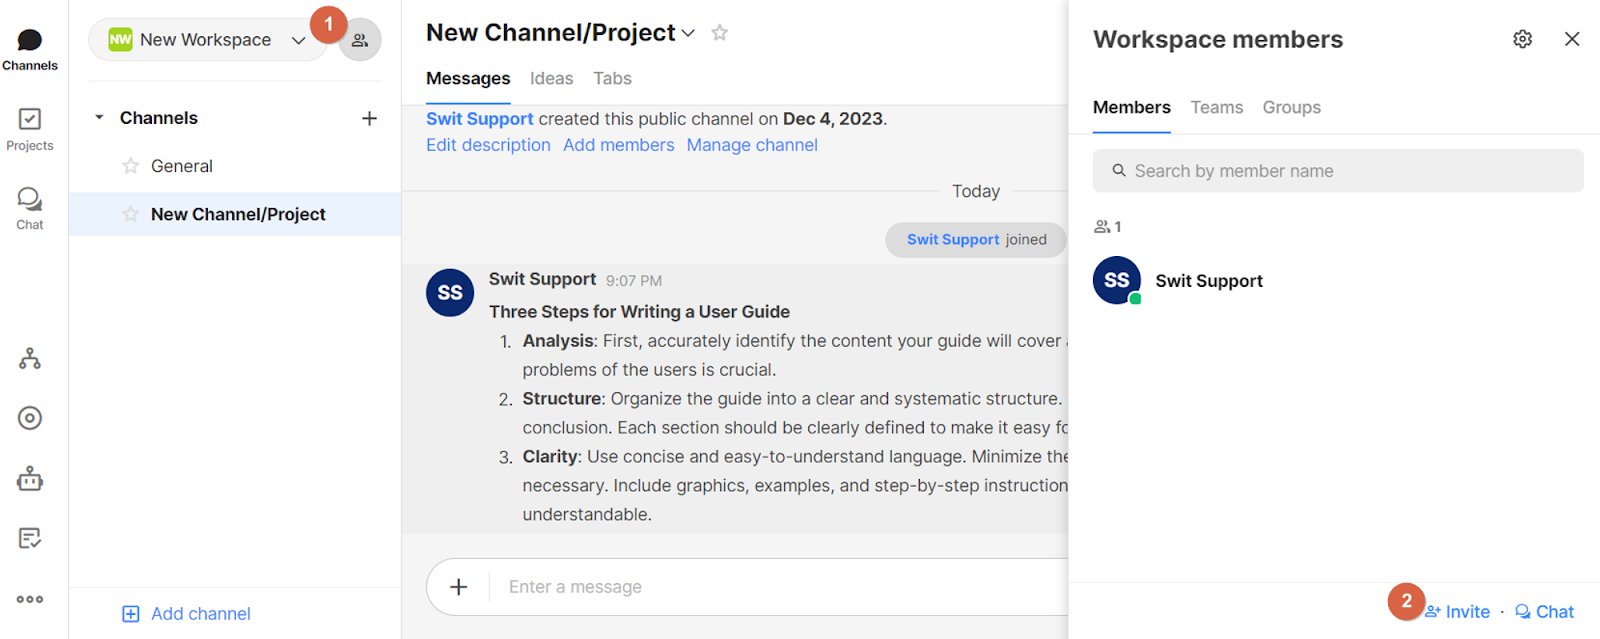
Invite members to your workspace
You can invite members or teams to your workspace as follows:
- Click the Workspace members icon next to your workspace name.
- Click Invite at the bottom right.
- Search for the members or teams you want to invite. You can also select the channels and projects to which you want to invite them.
NOTE
If the member you want to invite is not found, they may not have joined the organization yet, or they may already be a member of the workspace.
TIP
- When inviting members, you can select a team to invite the entire team to the workspace at once, rather than inviting each member individually.
- Click the Chat button at the bottom right of the workspace member list to start a 1:1 chat with the member.
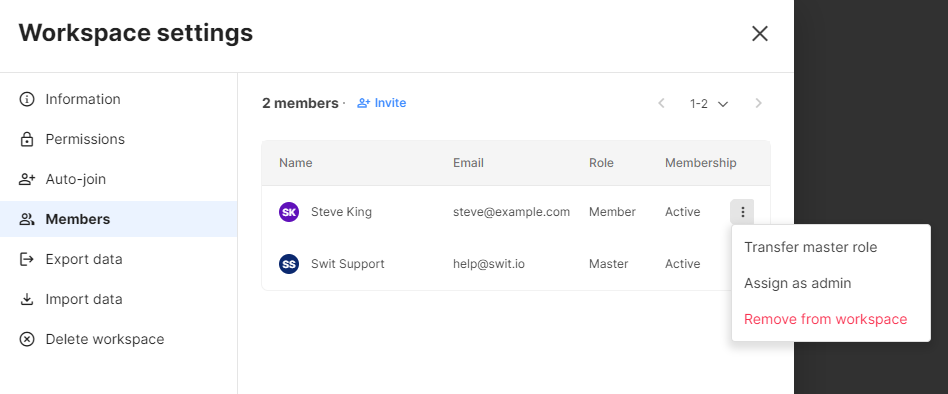
Assign workspace master and admin roles
You can also transfer the master role to a specific member or assign them as an admin. Enter Workspace settings > Members tab and click the ⋮ icon on the right of a member you want to transfer the master role to or assign as an admin. Workspace masters and admins have the following permissions:
- Access to the workspace settings menu
- Host permissions for the channels and projects they participate in
- Access to Workspace analytics
- Permission to remove members from the workspace
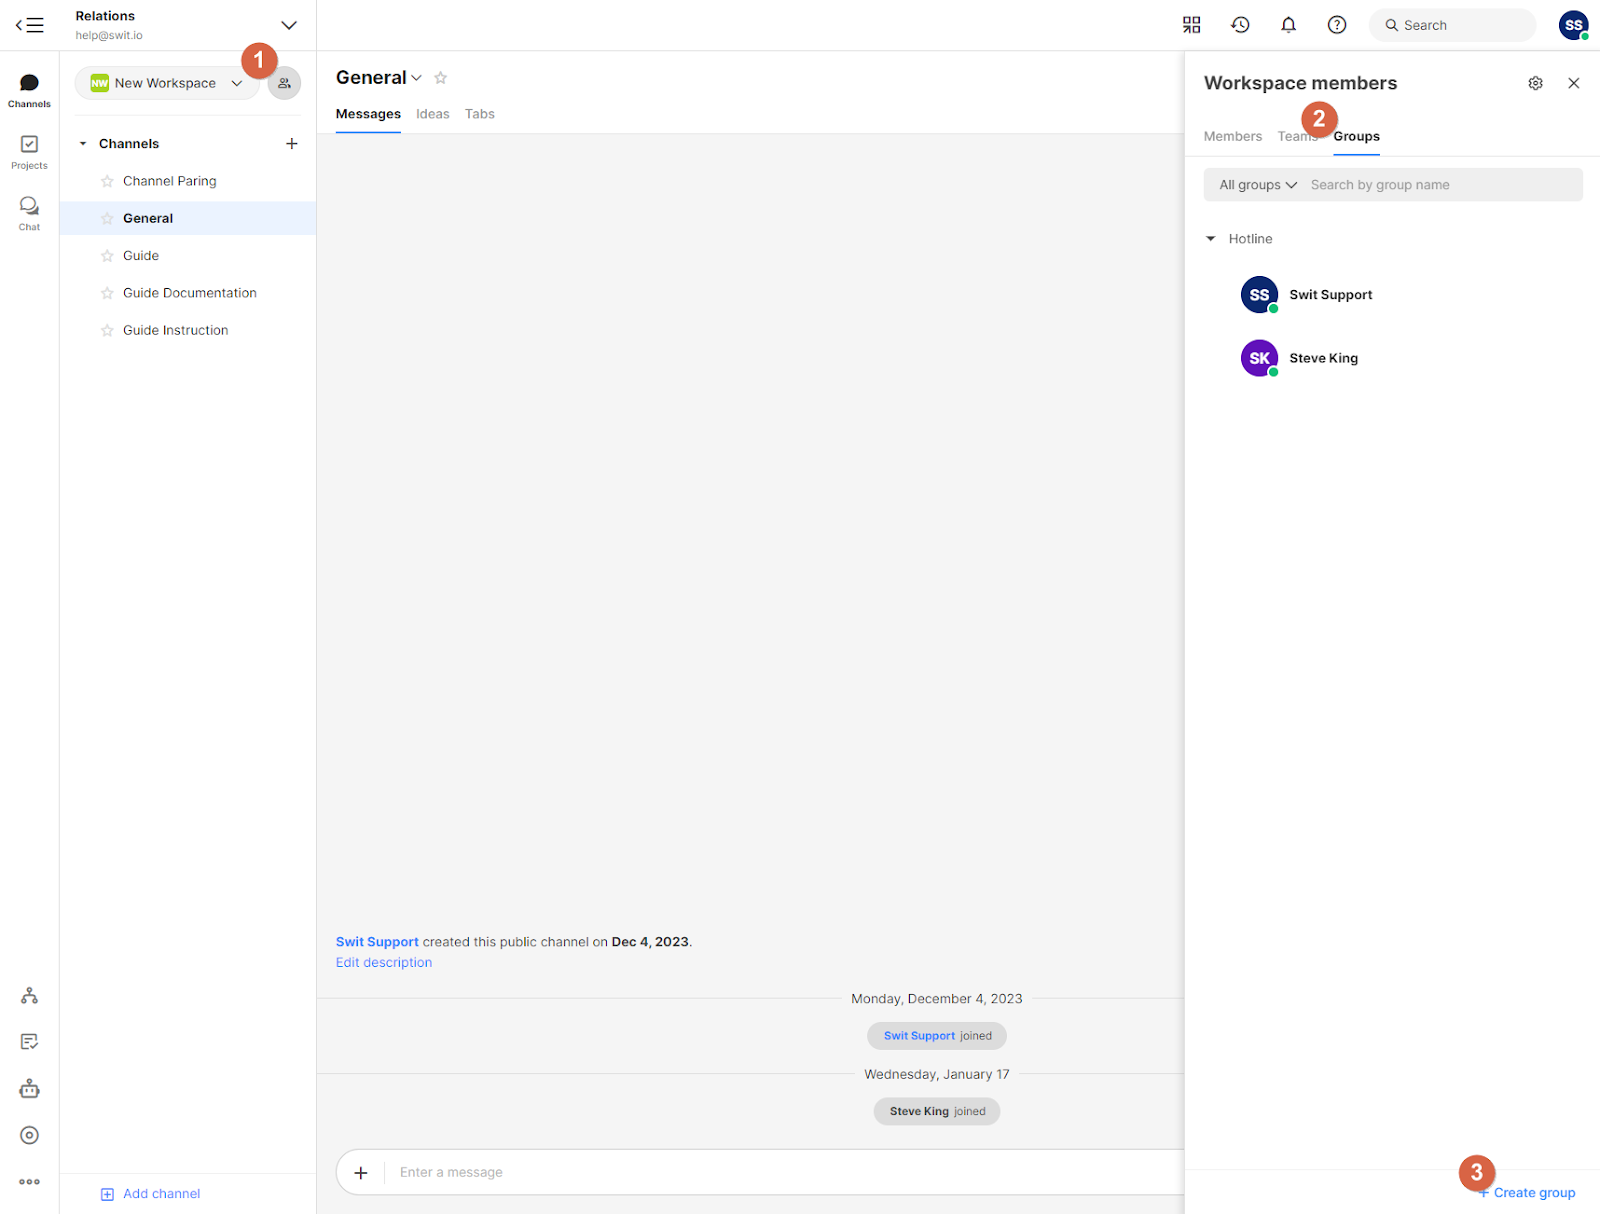
Create a group
You can create groups within your workspace for various purposes, such as project teams and task forces. To create a group, Enter the Groups tab in the Workspace members section, and click + Create group at the bottom. You can also edit the group information and add members to the group.
- Group mention: In channels, chats, and projects, you can mention a group, and all members of the group will be notified.
NOTE
The groups belong to the workspace where they are created, and the group feature is only available within the workspace.
Related topics
- Organization and workspace: Learn about how to manage the settings for your workspace.
What's next
Next, we will guide you through how the members can sign up to Swit and configure their initial settings after being invited to the organization and workspace.