Approvals
What is Approvals?
The Approvals plug-in allows organization members to request approval for various matters such as expense reimbursements, business trips, purchases of business supplies, and paid time off (PTO) hours. Because the process of managing tasks, communications, and approvals can be conducted entirely within Swit, members can focus on their work without having to switch between different apps. Moreover, you can share requests across any space within Swit, allowing for easy referencing of relevant members in your organization.
Approvals page overview
The Approvals page consists of the following elements.
- Approval request boxes: The requests that you receive, the requests you submit or the requests your team members circulate to your team, and your request drafts are piled up in the Inbox, Submissions, and Drafts respectively. For Approvals managers, All requests submitted in the organization are shown in a separate box.
- Left panel: This is where you can view the approval process in your request boxes according to your needs. Depending on whether you are in your Inbox, Submissions, or Drafts, you will see different folders in the left panel. In All requests shown only to Approvals managers, all requests in the organization can be filtered by in the left panel.
- Main area: You can see the status and the progress of approval requests in a list format. You can check the progress of requests shown in three statuses -- Pending, Approved, or Rejected, and also check the request member, request team, and the date submitted.
- Approval settings: Click on
 to designate your proxy approver in case you are on leave, on a business trip, or otherwise unavailable. When you designate a proxy approver, all requests asking for your approval will be sent to your proxy approver instead, and you will be added as a CC recipient to the request. For Approvals managers, Approvals settings is available, where they can create and manage approval templates, is available.
 - Search window: When you have many requests piled up in your request boxes, you can quickly search by request ID or title, member name, email, or ID.
- New request: Click to start a new request for approval.
- Refresh: Click to renew the request list.
- Go to Help Center: Click to move to the Swit Help Center for the Approvals plug-in.
Requested by and request team
Requested by refers to the individual seeking approval, while the request team is the team associated with that person. When initiating a new request, the requestor chooses their affiliated team. If they are primarily associated with a single team, it is chosen automatically. However, if they are part of multiple teams, they have the option to specify which team is making the request.
Approver
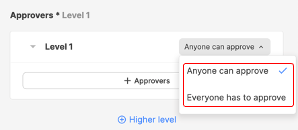
In order for your request to be successfully approved, approvers added need to approve your request. At least one approver is required for every request and at least one approver must be added for each of the levels added. The request must be approved in the lower level first in order for a higher level approver to be able to access the request. In the dropdown menu below, you can choose the approval option for each level.
-
Any approver can approve: When you add two or more approvers to a level, any of the approvers added in the level can approve the request before it proceeds to the next approval level. If any one of the approvers reject, the request is rejected right away. If only one level is added to a request, one approver rejecting will reject and close the request altogether.
-
Every approver must approve: When you add two or more approvers to a level, every approver added in the level is required to approve the request before it is available for the next level approvers.
NOTE
Approvers added to level 1 can view the approval requests in the inbox at the point of submission, but those added to levels higher than 1 have to wait for lower level approvers to approve the request before they can view the request.
Change approver levels
When there are two or more approver levels, you can change the levels of approvers. Click on( ), and select Move to lower level or Move to higher level.
Proxy approver
You can designate a proxy approver to approve requests submitted to you in case you are out of office. Click on the settings icon to open Approval settings and select My proxy approver. You can designate only one proxy approver, and to change the proxy approver, you have to delete the previously designated proxy approver first.

Inbox
All items requested to you, all items circulated to the Approver’s team when your team member is the approver, and all items circulated to your team are piled up in the Inbox tab. Use the filter option at the bottom of the left panel to filter the request list by status, template, date submitted, or whether it is starred.
Submissions
Requests submitted by you and the requests circulated to your team can be viewed in Submissions. Use the filter option at the bottom of the left panel to filter the request list by status, template, date submitted, or whether it is starred.
Drafts
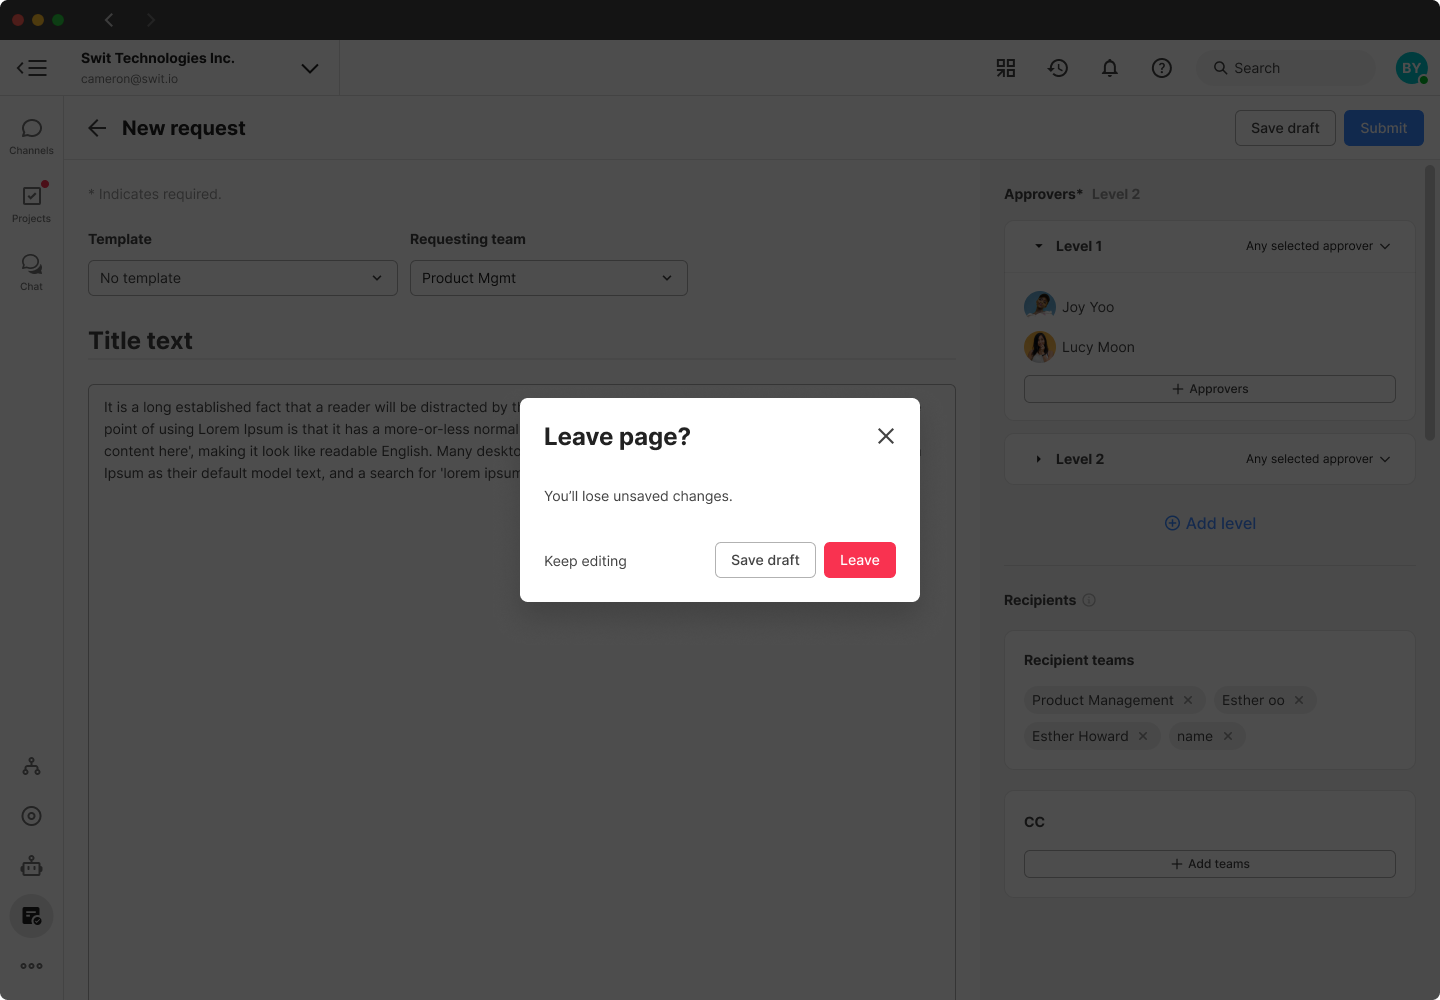
The requests saved as drafts and the requests recalled before the Level 1 approver started the approval process can be seen in Drafts. Requests in Drafts can be edited or deleted at any time.
TIP
Before exiting the page, you'll be prompted to save your draft, ensuring you can pick up right where you left off upon your return.
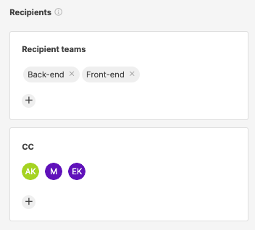
CC recipients and recipient teams
CC recipients and recipient teams are members and teams, respectively, that have access to the approval requests. When you or your team is designated as a CC recipient or recipient teams, your requests will be sent to your Inbox after they are approved.
Circulate to
You can set the approval request to be circulated to your team, approver’s team, or both. The members to which the requests are circulated to can view the requests in Submissions right after they are submitted.

Recipient teams vs. circulate to teams
When submitting a new request, you can choose who can access your requests. Setting recipient teams and circulate options have the following differences with respect to the accessible time and permissions.
| Recipient teams | Circulate to | |
|---|---|---|
| Accessible time | After approval | Right after submission |
| When in more than one team | Shared to all teams | When circulating to "My teams", shared to selected teams / When circulating to "Approver's teams, only to the primary team |
Approvals manager
Approvals managers have the following permissions over the approval requests in your organization.
-
View and manage all requests: In All requests accessible only to Approvals managers, they can view all approval requests within the organization.
-
Manage templates and template managers: Approvals managers can manage request templates and add or delete template managers in Approvals settings. Click on
 at the top of the Approvals page and click on Approvals settings to manage templates or roles. In Manage templates, click on + New template at the top right to add templates, or click on the trash can icon to delete existing templates. In Manage roles, click on + New template manager to assign template managers, or click on the trash can icon to unassign template managers.
 -
Add recipient teams or CC recipients: For requests that need to be sent to other members in the organization in addition to the recipients already added by the members upon submission, Approvals managers can add recipient teams or CC recipients to approved requests. To add recipient teams or CC recipients, click on
 in the request list or in the individual request page, and select Add recipient teams or Add CC recipients. You can add as many recipients as you want.
- Add recipients to multiple requests: Approvals managers can add CC recipients and recipient teams to multiple approved requests at once. This feature can be found in the "All requests" tab and is only available on desktop.
Manage templates
Approvals managers and template managers can create and manage templates for requests. When request templates are added in advance, organization members can fill in the templates for each type of request in a convenient way.
Write and submit a new request
When you want to submit a request for approval, you can do so as follows:
- Click + Create new in the upper right hand corner to open a new request form.
- Choose a template, write the title and details, and set the request’s approvers, recipients, whether to circulate it, and add attachments if necessary. The fields with asterisks are required in order for you to submit the request.
- When you fill in all required fields, the Submit button is activated. Click the button to submit the request.
Use the organization chart when writing a request
When writing a new request, you can also make use of the organization chart by clicking Navigate teams to add approvers, recipient teams and CC recipients.
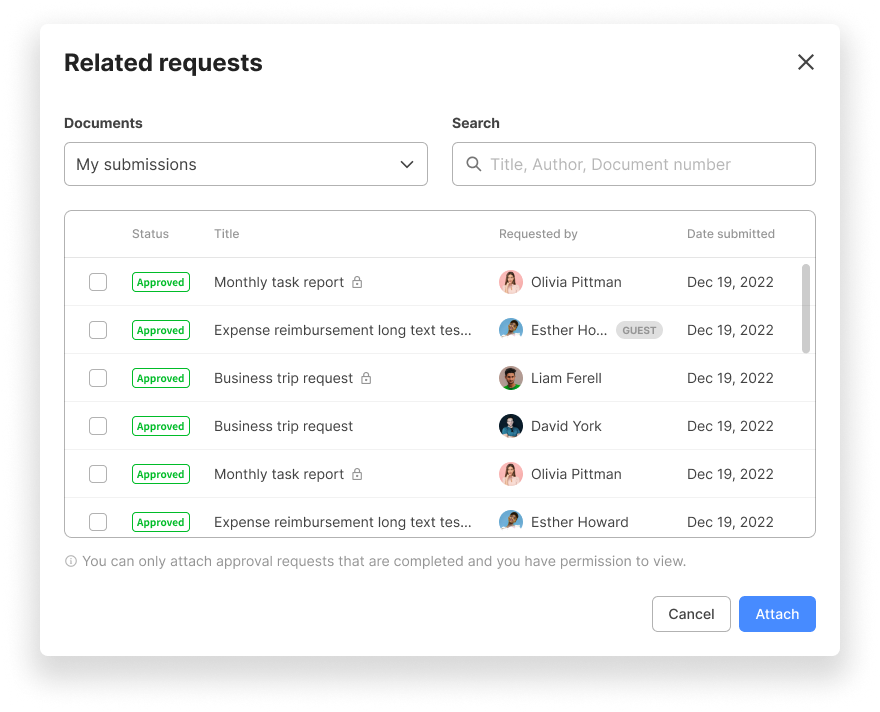
Attach related requests
You can enhance the relevance of your current request by attaching previously approved requests. Note that you can only attach requests that you have access to.
Recall a submitted request
After you submit your request, you can recall the request before it is approved or rejected by the level 1 approver. Recalled requests can be edited or deleted in Drafts. To recall your request, click the pending request in your submissions box, enter the detailed page, then click Recall.
Edit or delete a request before the approval process starts
All members can edit or delete the request before the approval process starts. To edit or delete a submitted request, you have to recall the request first. Recalled requests are automatically saved in Drafts, and you can edit the content and submit it again or delete the request. Note that once the approval process begins, you cannot edit or delete the request.
Restore or permanently delete requests in the trash
Approvals managers can restore or permanently delete all requests in the organization. Deleted requests are temporarily stored in the trash.
- In Deleted requests, you can Restore requests, which can be edited and resubmitted.
- To view the details of a deleted request in the trash, it first has to be restored.
- Click Delete forever to delete the selected requests permanently. Note that once a request is permanently deleted, it cannot be restored.
NOTE
The audit logs record details on who deleted or restored requests, including the date, user's name and role in the organization, and the request ID.
Receive email notifications for requests
You can choose to receive email notifications for the requests you're approving or the requests you've submitted. By default, email notifications are turned off, but you can customize your notification settings in User settings > Notifications > Emails.
- The emails are sent in English.
- Emails will not be sent for requests that are sent or circulated to you.
- The Date submitted reflects the time zone set in your Swit account.
Approve or reject a request
When a request is submitted for your approval in your inbox, you can approve or reject the request as follows:
- Open the request through activity notification or in the Pending tab of your inbox.
- Decide whether to approve or reject the request, then click Reject or Approve in the upper right hand corner.
- If you wish, you can use the comment section to provide your reasons for approval or rejection. Your comments will be recorded as part of the request, alongside its approval or rejection status.
Resubmit a rejected request
If your request has been rejected, you can resubmit it after reviewing the reason for rejection and making the necessary changes. Note that drafts for resubmission will not be saved, and the page will be reset if you exit. When resubmitting, you also have the option to attach approved requests.

NOTE
For resubmission, you cannot save the request as a draft or recall it.
Export requests
Approval requests may be exported for use in other apps or for printing purposes. The export feature is only accessible to Approvals managers and supports JSON and CSV file formats.
- JSON: Exports the complete dataset.
- CSV: Suited for exporting fields with single values per entry. Multi-value fields or complex data structures, such as approvers, approval rule, recipients, and comments, are not included.
Status values when exporting JSON files
-
Approval status (approvals_status)
- 0: Draft
- 1: Submitted for approval
- 2: Approved
- 3: Rejected
-
Approval rule (approval_rule)
- 0: Any approver can approve
- 1: Every approver must approve
-
Circulate to (circulation)
- 0: The request was not circulated to any team.
- 1: The request was circulated to the requestor's teams.
- 2: The request was circulated to the approver's teams.
- 3: The request was circulated to both the requestor's and approver's teams.
NOTE
The "link" provided in the export acts as the direct URL to the specific approval request, facilitating instant document access.
Manage Approvals in the Admin console
The organization’s master and admins can manage Approval settings in the Admin console.
-
Approvals managers tab: The organization's master and admins can designate Approvals managers in the Approvals managers tab in the Admin console.
-
Google Drive tab: You can register a Google account owned by the master or admin to enable organization members to attach Google Drive files to approval requests. All Google Drive file attachments to requests will be added as copies in the registered account’s Google Drive folder, and only the account owner can access and edit them.
NOTE
Google Drive files attached to Approvals are saved as copied files to prevent requesting members or approvers from editing and damaging the original files. The account owner, or the master or admin of the organization, is assigned as owner of the copied files, and other members involved in the approval process are viewers who can only view the files.
Guests in Approvals
Organizations using the Guests plug-in can extend access to the Approvals plug-in to guests, enhancing teamwork and collaboration. However, access to organization-related features is still restricted, maintaining security.
- Guests can create and submit approval requests, as well as approve or reject requests as approvers.
- Guests do not have access to the organizational chart, team-related features, and Approvals settings.
- Because guests cannot be issued tokens, they are restricted from accessing Approvals via the Open API.