Automation
What is Automation?
Automation is a Swit plug-in that enables users to define rules for triggers, conditions, and actions associated with events occurring within Swit and Swit Store apps. Users can configure these rules based on triggers, conditions, and actions for each category, and customize automation rules according to their needs. Up to 10 conditions and actions can be added to a trigger for each rule. Using the Automation plug-in, users can automate repetitive tasks with simple rules to reduce unnecessary repetition, which allows them to concentrate better within an optimized workflow.
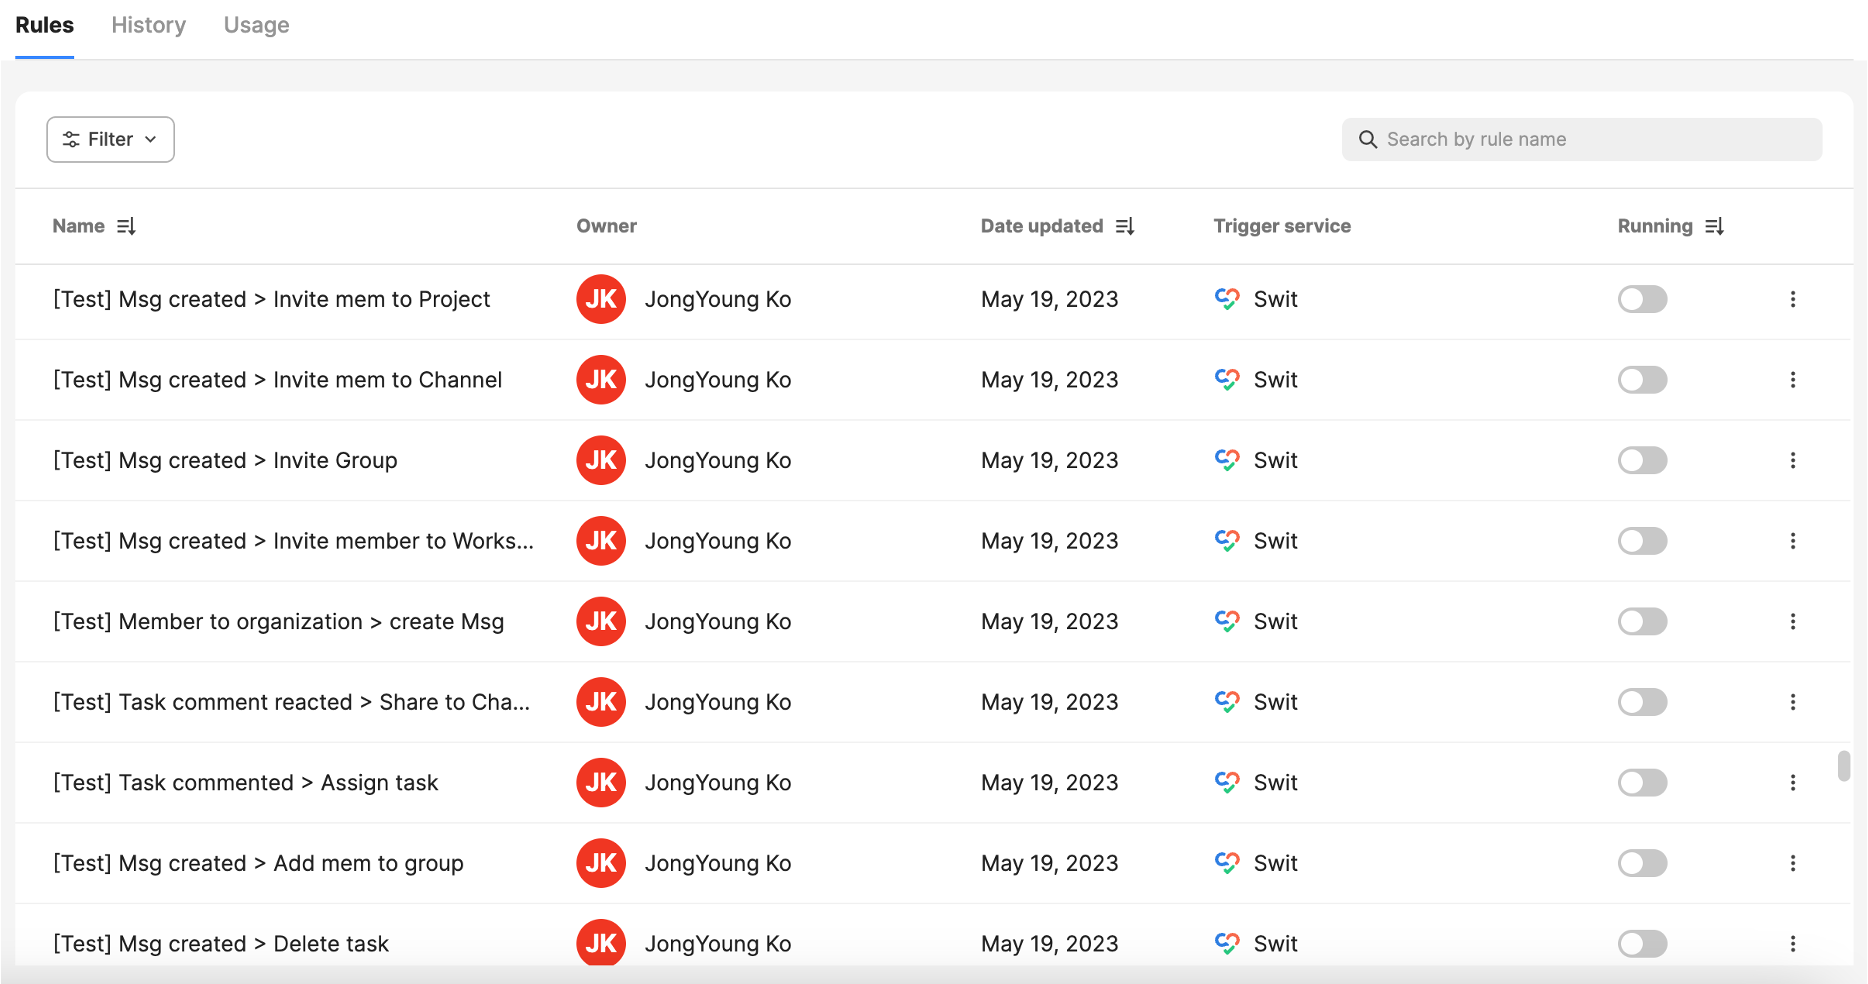
Rules
On the Rules tab, the list of all rules created within the organization is displayed. The list of rules differ based on the Automation permissions. Click on each rule to open Rule info in the right panel where you can view the name, owner, date updated, status of the rules and how each rule's trigger, conditions, and actions are configured. Clicking on the expand icon will open the rule details page, where you can see the action log, change log, and settings of the rule.
NOTE
In the Rules tab, regular members cannot view the rules other members created.
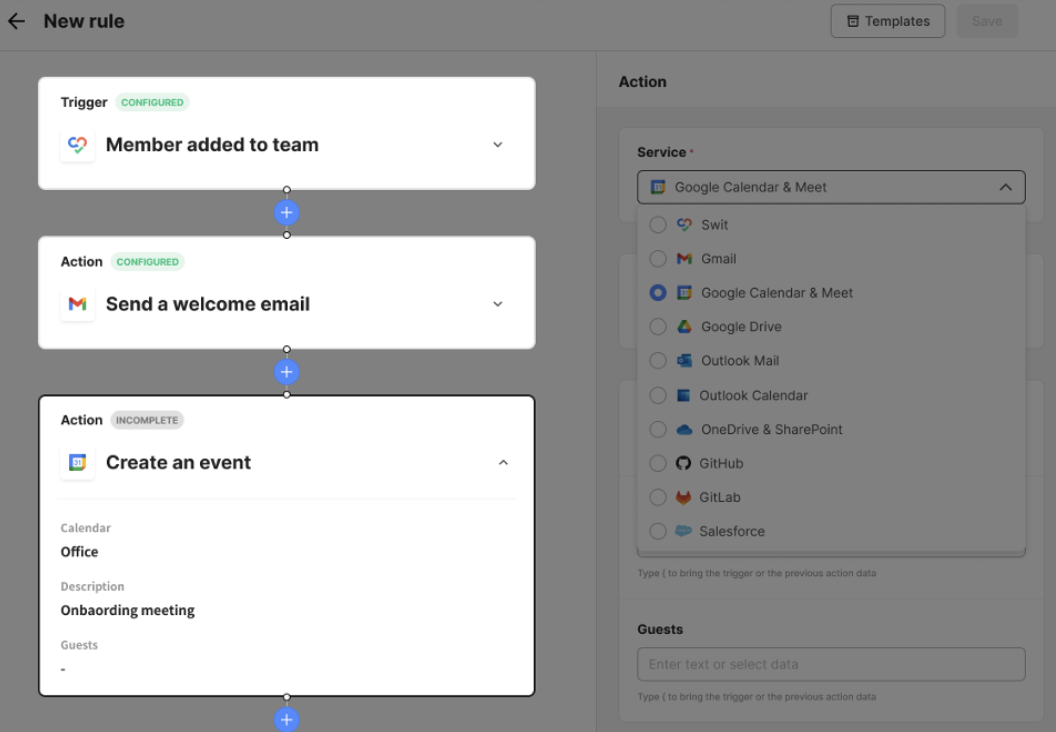
New rule
To create a new rule, click on the + New rule button at the top right of the Rules tab. Select the desired location for the event, choose a trigger, add conditions if necessary, then specify actions. You have to fill in all required fields marked with an asterisk (*), and authenticate with the designated service account to finish creating the rule. You can also use the automation template library for rule templates.
History
Members in the organization can monitor in real-time whether the automation rules are being executed. The run date, run time, rule name, status, and duration are recorded, and users can filter or search the list to find the rule they are looking for.
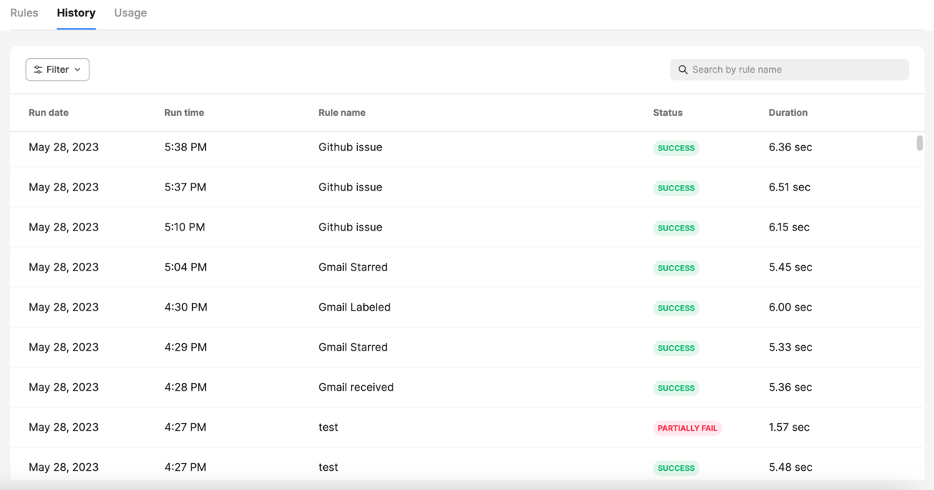
Automation status
In the History tab, you can find each rule's status. You can filter by Success, Unmet Condition, or Partially fail to see the list by status.
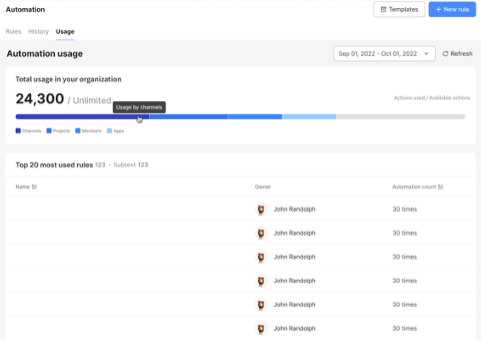
Usage
The total usage in your organization for channels, projects, members, and apps for a given period is displayed in a graph. Clicking on each item will allow you to see the detail for the rule count for each location. At the bottom of the usage page, the top 10 most used rules in the organization are displayed.
NOTE
The Usage tab is only viewable to Automation managers, and not to regular members.
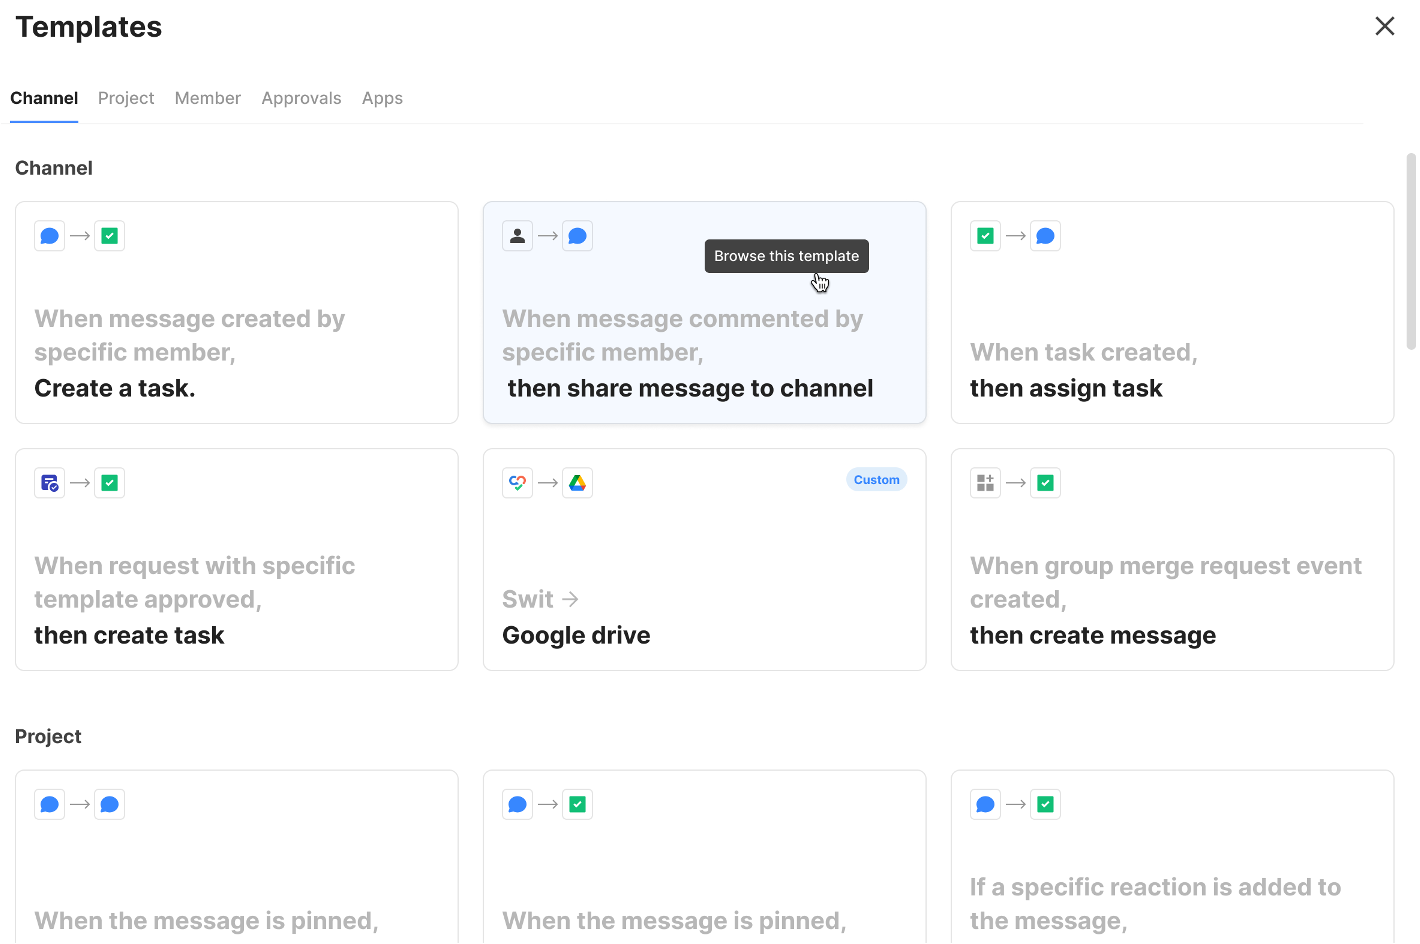
Automation templates
When using the Automation plug-in, the representative rules that can be used are provided as templates. Click on the Templates button to see all the rules in the organization and use a template to create a rule efficiently.
What is a trigger?
A trigger is an event that initiates an automated workflow, and it can connect different apps and services for smooth integration and automation. When setting a rule, triggers are typically defined as the starting point of a workflow. When a trigger event occurs, Swit detects the event and executes a specific condition or an action in response to that trigger.
Trigger types for Swit
When using the Swit app, users can create the triggers based on the activities that occur within channels or projects, or when members are invited or participate. Also, when using the Approvals plug-in, you can set triggers when a request is approved or rejected.
Trigger types for other Store apps
Various triggers can be set for activities outside the Swit app such as Google Drive, Gmail, Google Calendar, GitHub, and other 3rd party apps.
What is an action?
An action refers to the desired outcome that occurs through the integration between apps or services when a trigger event takes place. You can either set actions to occur immediately when a trigger event happens, or add specific conditions to the trigger so that the actions occur only when those conditions are met.
Automation managers
Automation managers can activate, deactivate, or delete all rules in the organization. Depending on the setting, Automation managers can add or remove rule managers.
Set Automation managers
Organization admins can set Automation managers in the Automation managers menu in the Admin console. Up to 100 Automation managers can be added.
Rule managers
Rule managers can create automation rules and manage rule templates. Note that rule managers can only manage rules, not the whole automation feature like automation managers can. Rule managers cannot view or manage the rules created by other members.
Automation permissions
When implementing the Automation plug-in for the first time, the master of the organization is set as the automation manager. The master can add up to 100 Automation managers, and once assigned an Automation manager, they have the permission to add other Automation managers or remove them. See the table below for detailed permissions for each activity.
| Organization master | Organization admins | Automation managers | Rule managers | Members | |
|---|---|---|---|---|---|
| Set Automation managers | O | X | O | X | X |
| View rules created by self | O | O | O | O | O |
| View rules created by others | X | X | O | X | X |
| Create rules | O | O | O | O | O |
| Edit or delete rules created by self | X | X | O | O | X |
| Delete rules created by others | X | X | O | X | X |
| Activate or deactivate rules made by others | X | X | O | X | X |
Utilize rules
You can create, edit, duplicate, or delete rules in automation. See below for ways to utilize rules.
Create a new rule
You can create a new rule as follows:
- Enter the Automation plug-in page.
- Click on + New rule at the top right-hand corner.
- Select the service to set the trigger in, then select each step for the trigger. After selecting the service and trigger, you have to sign in to your account to use the app.
- After signing in and selecting all options, a trigger is created. You can also add conditions or actions you want for the rule.
- Adding a condition will make the actions to be executed when the specified conditions are met for a trigger.
- You can also make the actions to be executed without selecting conditions.
Edit a rule
You can easily edit a created rule and use it as another rule. To edit a rule, click the more icon ( ) on the right side of each rule, and select Edit.
Delete a rule
Click on the more icon () on the right side of each rule, and select Delete to delete the rule.
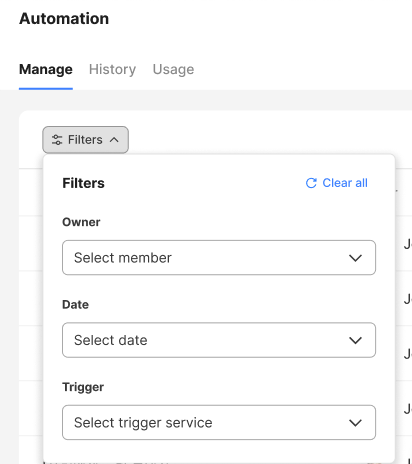
Search for a rule
To search for a specific rule, search by the rule name or filter the list by dateor trigger service.
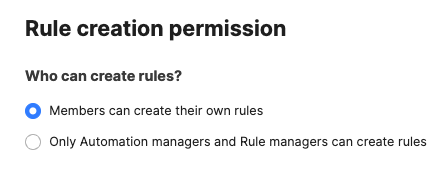
Set rule creation permissions
Organization admins can set the rule creation permissions in the Automation menu of the Admin console. They can allow all members in the organization to create their own rules or only Automation managers and Rule managers to create rules for the organization.
Create a rule using a Salesforce trigger
To create a rule using a Salesforce trigger, you have to configure outbound messaging and Flows in Salesforce first. Specific events in Salesforce trigger outbound messages, which are then sent to Swit to initiate actions. Follow the steps below:
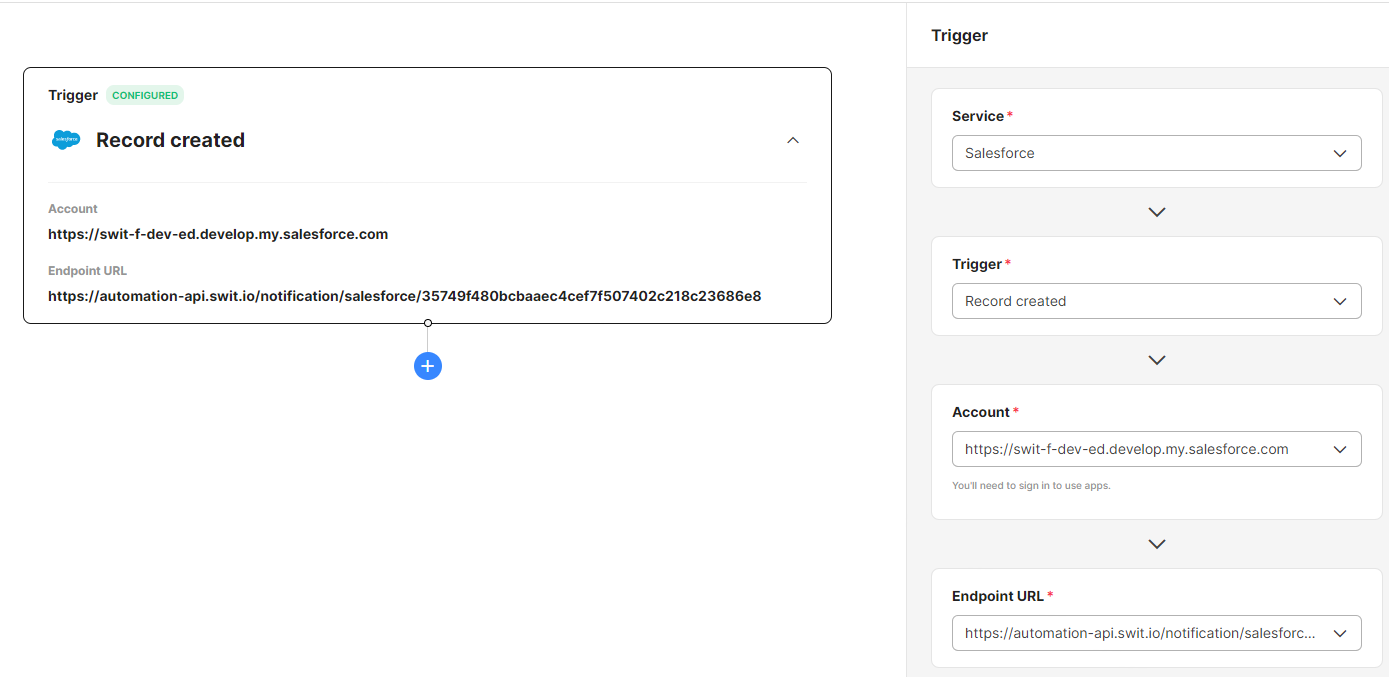
- Create an automation rule in Swit.
- Select a trigger with Salesforce, and click Create URL. This will automatically generate a webhook URL, which will be later used as the endpoint URL in setting up a Salesforce Flow.
- Select a trigger with Salesforce, and click Create URL. This will automatically generate a webhook URL, which will be later used as the endpoint URL in setting up a Salesforce Flow.
- Configure outbound messaging in Salesforce.
- In the Setup page, search for Outbound Messages in the search window or go to Process Automation > Workflow Actions > Outbound Messages.
- When filling in the required information, enter the webhook URL generated earlier as the Endpoint URL and select the fields you want included in the outbound message.
- In the Salesforce Setup Home, build a Flow in using the Flow Builder.
- Go to Create > Flow and select Record-Trigger Flow to configure the trigger.
- You can set the conditions to trigger an outbound message.
- Add an Element to the Flow.
- Select Action and search for the outbound message created earlier to add the outbound message action. Fill out the Label and API Name.
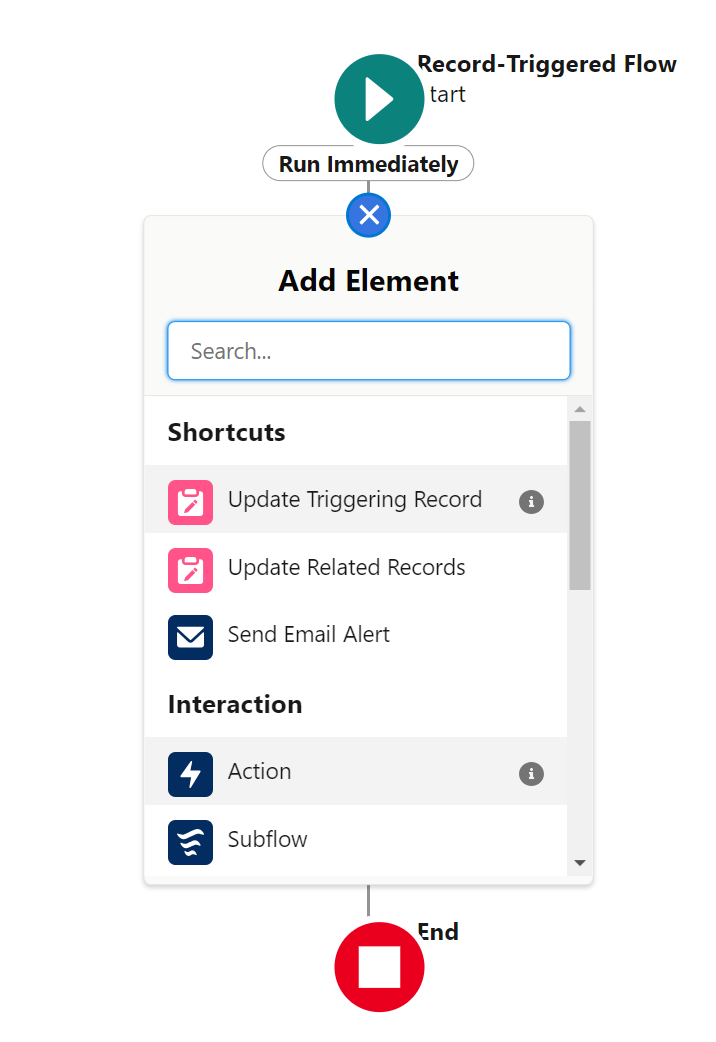
- Select Action and search for the outbound message created earlier to add the outbound message action. Fill out the Label and API Name.
- Save and Activate your Flow.
NOTE
The trigger will not function unless the Flow is activated.
- Return to Swit and finish creating the rule.
Example: Streamlining sales with HubSpot and Swit automation
Enhance your sales workflow by automating the creation of Swit tasks from new HubSpot deals.
-
Initiate rule creation: Start by clicking + New rule.
-
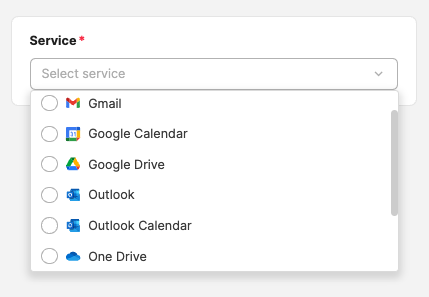
Configure the trigger:
- Choose HubSpot from the Service dropdown.
- Select Deal record created as the trigger.
- Link your HubSpot account by picking your email from the Account dropdown and authorize.

-
Define the action:
- Below the trigger configuration, click on the + button and then select Action to add a task creation action.
- Tailor the task with a title, description, and team assignment.
-
Finalize the automation:
- Hit Save to store your settings.
- Ensure the rule is enabled for immediate activation.
-
Manage and monitor: Keep track of the new tasks in Swit for efficient deal progress.
With this setup, you guarantee a seamless flow from deal logging to action, improving team collaboration and deal closure rates.